
Working with Images in Blog Posts
January 19th, 2017Blogging with Everweb 2.0 lets you easily combine text and images to get the right look for all of your blog posts. Images can be added to blog posts in three ways: Firstly, on a global level so that any image appears on every blog post (like how a Master Page works), secondly, by adding the image on a post by post basis and thirdly by a combination of the first two techniques.
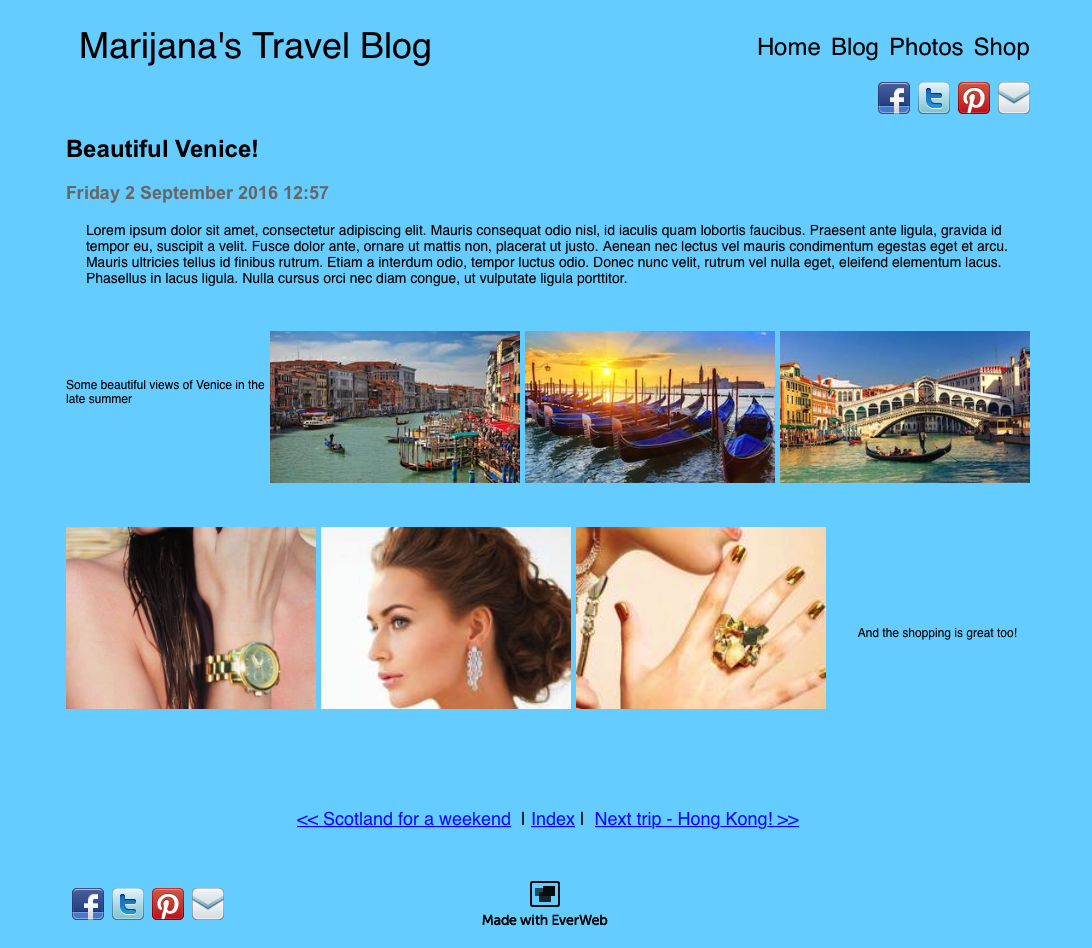
The images in the above blog post are set with an ‘inline’ display and aligned either left or right in the Blog Post Editor Window to get the desired result. The Navigation Menu widget, text box title and social media buttons are added to the Preview Window so they appear on all posts.
Preparing Images
When adding images to any web page, it’s always a good idea to make sure that the image(s) you are going to use are of a web friendly file size. It is also useful if the image file name relates to what the image is about. Preparing your image in this way will benefit web page load times and help your page’s SEO.
Adding Images to All Blog Posts
There are two ways in which to add an image to all of your blog posts at once:
The first method is to use a Master Page that includes the image(s), and any other objects you want. Attach the Master Page by first selecting the ‘posts’ page in the Web Page List. Next, go to the Inspector Tab and select the Page Settings button. Use the Master Page section to add the Master Page you want.
Using this method means that you will need to edit the Master Page if you want to make any changes to the objects it contains . To see the results of the using the Master Page, use the Blog Posts Preview Window.
The second method uses the Blog Post Preview Window as a ‘live’ Master Page. Drag and drop your image(s) from their source, e.g. the Assets List, on to the Blog Post Preview Window. Move and resize the image around the Preview just as you would on a regular web page in EverWeb. The dropped image and layout you have designed for the post will be applied to all posts.
The advantage of the first method is that you cannot move objects around the Preview Window. The advantage of the second method is that you can! Choose which method suits your requirements or use both!
Remember that moving or deleting images in the Preview Window on any blog post, will move or delete the image from all of the blog posts. It’s a good idea to think of the Preview Window as a ‘Live’ Master Page!
Adding Images to Individual Blog Posts
If you only want to add images in to a particular post, select the post you want. then drag and drop the image on to the Blog Post Editor Window. You can use images from the Assets List, from folder locations or using EverWeb’s Media button.
If using the Media button, drag the image you want from the ‘catalog’ on to the Editor Window. The Media button is useful as you can check the file size of the image before importing it. To do this, right click on the image in the catalog and select ‘Display as List’ from the menu. If you do not see file sizes listed, right click on the image again and select Show Columns-> Size.
Changing Image Size
Once you have dropped the image onto the Blog Post Editor Window, select it by clicking on it. A blue selection box appears around the image. Move and resize the image just as you would elsewhere in EverWeb. When the image is selected, the Image Editor Toolbar is available. For precise image sizing, click on the last Toolbar option, ‘Change Size’, and enter the value you require. Note that the image proportions remain are always constrained so that the image does not distort when you resize it.
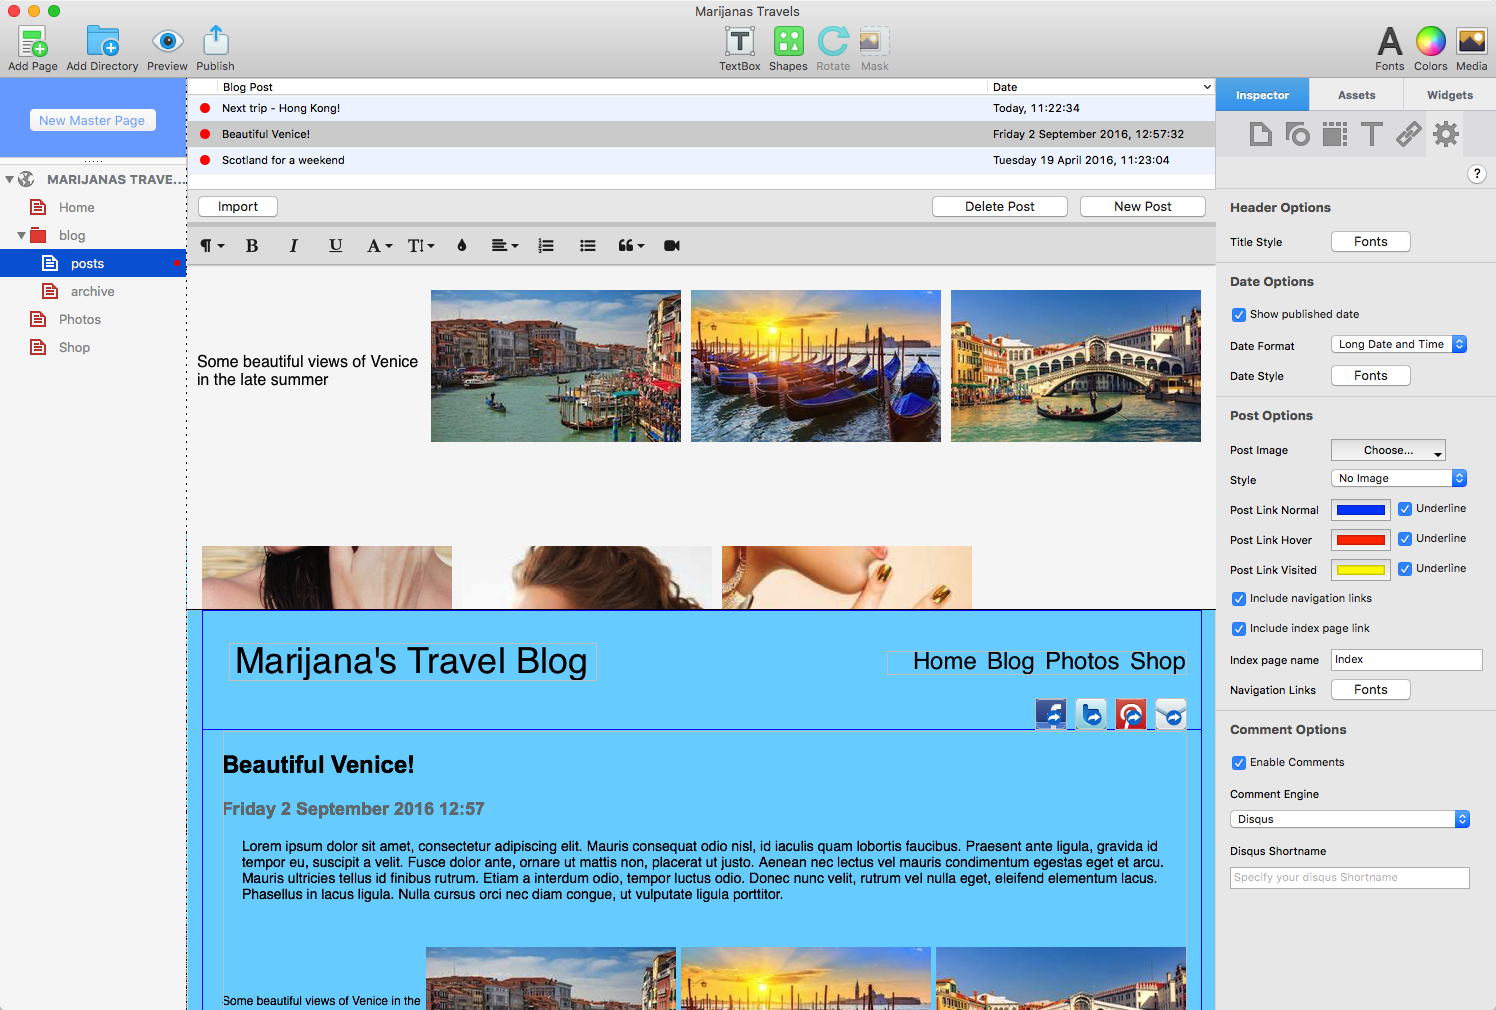
The Blog Post Editor Window contains six images and text aligned to the left or right of the images. In the Blog Posts Preview Window below, you can see that objects that we want to include on all of the blog posts have been added in the header and footer areas. The background color of the page has been changed using the ‘posts’ page settings from the Inspector Tab.
Using Image Display
An image imported into the Blog Posts Editor Window is displayed as ‘Break Text’ by default. This means that any text around the image will be displayed above and/or below it depending on where the image is located. Use the Image Editor Toolbar to change the ‘Display’ from ‘Break Text’ to ‘Inline’ to embed the image more within your text. Once you have set ‘Inline’, use the ‘Align’ button to either left or right aligned to get a text wrap effect. Use the middle ‘Display’ option to cancel out the wrap effect.
If you are displaying multiple images in a row, it is easier to drag and drop the images on to the Blog Post Editor Window first before setting the ‘Inline’ and ‘Align’ options. In the examples above , Align has been set to Right for all the images on the top row and left for those on the bottom row. This results in the text being pushed to where it is desired. You may also find that changing the image size using the ‘Change Size’ button will help fit the images properly in a row. In the above example, the images were reduced from a width of 300px to 250px.
Alternate Text
It’s always good to add a description of the image using Alternate Text. Use text that’s appropriate e.g. ‘Gondolas in Venice’ may be suitable for our example. If the image does not display, the alternate text is used to replace it. Alternate text is especially useful for the visually impaired and may help your SEO.
The Blog Posts Preview Window
As you may already know, the results of your work in the Blog Posts Editor Window are seen in the the Blog Posts Preview Window. Here you can see the results of combing images in your posts with images that are used for every post. Use the Preview button in EverWeb’s Toolbar art the top of the UI to tweak the look of your blog posts before publishing.
Using images in your blog posts always helps to bring the post to your audience’s attention. With a bit of experimentation you will be able to make very creative posts. We will have a follow up blog soon with more hints and tips on using images in your blog. In the meantime if you have a question, please let us know below. If you subscribe to our YouTube channel, you will also find lots of blogging related posts there too!
As always please let us know if you have any comments and questions. We’re happy to help. You can also find EverWeb on the following social media platforms:
Twitter handle @ragesw
March 20th, 2018 at 4:19 am
helpful post