Archive for the 'Third Party Software' Category

EverWeb’s Help Resources Make Building Your Site Easier and Quicker!

Friday, September 1st, 2023
EverWeb 4.0 is Coming Soon! Find out how to get up to speed quickly on all the new and updated features!

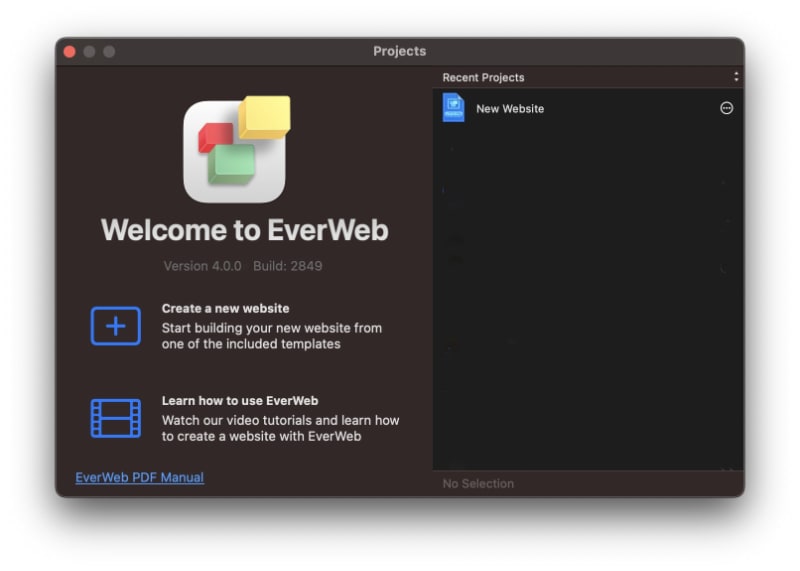
As we put the finishing touches to EverWeb 4.0 before unleashing our new software on to the world, web are reminded that with each new EverWeb version there is always some new learning involved. EverWeb 4.0 has some totally new features such as Membership and Subscription sites – which is huge! There is also the overhauled Text Inspector which will make building your site even easier, giving you the flexibility with fonts and text both now and in the future.

These are just a couple of examples of what’s coming but no matter how much we craft EverWeb to be as easy and intuitive as possible, you may want to dig deeper to get the best and most out of its features. Here are some suggestions on getting a fast start on discovering and using new EverWeb features.

The EverWeb User Manual

The EverWeb User Manual is your most detailed resource for all of the features of EverWeb. The manual is designed for first time EverWeb users as well as for experienced users who just want to dip in for some specific information. The EverWeb User Manual is updated with every release of EverWeb, both on Windows and on Mac. The manual is in PDF file format so you can easily search its contents, save a copy locally, or even print it out if you want to.

You can find the EverWeb User Manual in two places in EverWeb: As a link in the bottom left hand corner of the Projects Window or from the Help-> EverWeb PDF Manual menu option.

EverWeb’s Help Icon

Context sensitive help is always at hand within EverWeb though the Help Icon. This icon is displayed as a question mark symbol within a circle. You will see this icon displayed beside many of EverWeb’s features and also in the Widget Settings of many of EverWeb’s widgets. When you click on the icon beside a feature, a pop-up window will display with an EverWeb website, or YouTube, video describing the feature that you asked for help on.

The EverWeb Website

Help is always available on EverWeb’s own website. If you are completely new to EverWeb and to building a website for yourself, there is a great beginners video series available for you. If you are a photographer, amateur or professional, there is also a series for you to help you get the best out displaying your photos on the web. This series is currently being updated, so check out our YouTube and Facebook pages to discover the latest videos! getting your website up and running quickly if you are new to EverWeb. If SEO is important to you, or your business, there is a special series on EverWeb and SEO that contains short, to the point, videos on all aspects of EverWeb and SEO.

The EverWeb website also has other resources to explore such as its own blog where you can keep up to date with the latest in the world of EverWeb. If you need third party theme templates or widgets, check out the EverWeb Third Party Vendor page. This page is also great to find add-on products to connect you with other vital internet resources.

EverWeb’s own site can also be used to tap in to Support resources such as knowledge bases and contact with support personnel. Check out the menu options to find the right kind of support that you need!

Videos and Blogs

We all have our preferred medium for accessing help and support resources. Many people prefer to help and instructional videos. We try to make our videos short and focused so that you get to the help and support that you need in a timely manner. We also aim to make any instructions clear and concise. You can find EverWeb videos on our own website, on YouTube or FaceBook. If there is a video topic that is not there for you, please do let us know so that we can include this for you.

We also try to update videos on a regular basis to take in to account of new EverWeb features and also new technologies that are constantly emerging. We also try to expand EverWeb world by connecting and integrating you with other products e.g. financial and commercial product, calendaring and scheduling products, event management products, internet marketplaces and so much more! Again, if there is a product or service that you want to integrate in to EverWeb that there is no video for, do let us know in the Comment section below.

If video is not for you then blog posts can offer a great experience for you. EverWeb includes many instructional videos where we try to bullet point the steps along the way to make it as easy as possible for you to get to where you need to be. As with the videos, if we do not have a blog post for what you need, let us know.

You can find blog posts related to EverWeb on EverWeb’s own website, Rage Software’s (the maker of EverWeb) site, All About iWeb, iWeb Unlimited and Everything EverWeb.

EverWeb on Social Media

You can also find help on EverWeb’s social media accounts. This is a good place for keeping up with all the latest EverWeb news, videos and blog posts. It is also a place where you can ask questions to us as well. At the bottom of this post you will find the links you need to keep updated with EverWeb!

The EverWeb Forum

Use the forum for any questions that you may have about EverWeb. The forum is also announces the availability of new beta test versions of EverWeb if you want to try them out, as well as notifying you of official new releases. The EverWeb Forum is a great place to connect with the EverWeb Community and its third party providers.

EverWeb has the complete range of resources to help you discover new and updated features and to get the most out of them, quickly and easily. If there is anything that you think is missing in our support for you or if you have an idea about how we can improve, please let us know in the Comments Section below.

Enjoy EverWeb 4.0! Coming Soon…

EverWeb on Social Media

You can also find EverWeb on the following social media platforms:

Facebook

Flipboard

YouTube

Twitter / X

Instagram

Linking eBay and Other Internet Marketplaces Into Your EverWeb Website

Friday, May 12th, 2023
Integrating your Internet marketplace in to EverWeb

Integrating Internet Marketplaces, such as eBay, Shopify, Facebook or Etsy amongst others, within your EverWeb website is something that can be desirable as it helps extend your sales reach as far as possible. As a seller of goods and/or services you will want to reach as many potential buyers as possible.

Extending Your Sales Reach

As a seller, you will want to maximise your sales reach with the minimum of effort. Your website may, in fact, be your primary sales driver, as it is probably the main place where your customer base will come to first for your goods and services. Your website is a great place to attract an audience that fits your market niche. It is also where you can easily apply SEO focus and if you want to rune your SEO then there is also EverWeb’s SEO PowerUp addon to help with fine tuning.

Using an Internet Marketplace might be a great way to give your sales a lift. Sites, such as eBay, probably have a far bigger customer base than you can achieve with your own website. Tapping in to this may be advantageous as it is a quick and easy way to broaden your potential customer reach. The downside to this, though, is that you will have to set up and maintain your goods and services again, You will also probably be subject to seller fees as well.

The solution to duplicating work is to offer your products and services through your Internet Marketplace and linking them back to your website. This will save you time and effort when adding, removing and updating your products and services.

What Is Important For Internet Marketplaces…

Many Internet Marketplace vendors used to offer ways in which you could directly integrate the goods and services sold on their sites directly in to your own website. This provided an effective way for sellers to easily link to their marketplace vendors.

Times have changed, though, as many such integration tools offered by Internet Marketplaces have either been stopped altogether, are offered as a premium product to purchase by sellers, offered as part of a marketplace ‘developers’ kit or have been replaced by third party solutions. 

Making linking to your website more difficult helps Internet Marketplaces retain potential buyers in their website and ecosystem. It also ties in sellers too, as many Internet Marketplaces vie to be a ‘one stop shop’ for both buyers and sellers.

Integrating Your Internet Marketplace In EverWeb

As it becomes more difficult to easily link your website in to your Internet Marketplaces, you could spend a lot of time and effort looking for a solution . Here are some options that may help you reduce the time and effort on finding an integration solution…

  1. Check out the EverWeb Addon Resources Page: You may find the solution to integrating your Internet Marketplace with EverWeb from EverWeb’s Addons page. For example, EverWeb integrates with platforms such as Shopify, Etsy, SoundCloud and so on. Check out the Resources -> EverWeb Addons page in the EverWeb website to see if your vendor is already supported.
  2. Checkout EverWeb’s Videos on YouTube: EverWeb’s YouTube channel includes a lot of integration videos to other products including Internet Marketplaces. You can quickly search YouTube to discover if the integration you require is already there.
  3. Check out EverWeb’s Blog Posts: Search our blog posts for the Internet Marketplace vendor you are wanting to integrate with. Also check out third party blog posts too such as All About iWeb.
  4. Third Party Widgets: Another good source for integration is to check to see if any of EverWeb’s Third Party Widget vendors have created a widget to link to the products and services in your Internet Marketplace. Some third party vendors may even offer to build a widget for you although this may be chargeable. Check out the EverWeb Addons page for a list of Third Party Widget vendors.
  5. Check out Your Internet Marketplace’s Resources: Sometimes using your marketplace’s forum is the quickest way to find out if integration with your website is possible. It may be that this information is easy and upfront to find, but be aware that sometimes this information is buried deep in the vendor’s website, or in their developer resources. You may find that integration is easy or requires coding knowledge. You may also find a lot of information is out of date. If there is no information easily available, then the chances of easy integration is likely to be less. The best option here is to ask immediately if integration is possible before wading your way through your forum.
  6. Legacy Resources: Sometimes vendors have, in the past, offered integration tools to link your market place to your website. However, many vendors have now stopped this practice. These such resources may, or may not, still be available for use. If a resource is still available, it may now work with limitations. Our advice is to use your vendor’s user forum to ask if there is any way to integrate your market place in to your website and what possible problems and limitations using a legacy solution may bring up.
  7. Use EverWeb’s HTML Snippet Widget: One of the easiest ways to integrate your Marketplace in to EverWeb is usually by using the HTML Snippet widget. Here, your marketplace vendor creates a piece of code which can be used to link e.g. one of your products or services, in to your website. In EverWeb you would add the HTML Snippet widget to your page then paste in your vendor’s code in to the ‘HTML Code’ section of the Widget Settings then press the ‘Apply’ button to save the changes.
  8. Ask EverWeb!: If you cannot find an integration that works for you, you can always ask EverWeb Support of use the EverWeb Discussion Forum to ask if integration is possible.
  9. Use Hyperlinking. If your Marketplace vendor does not have a way to integrate in to your website, or if the cost of doing so is prohibitive, then often the only way left to integrate is by hyperlinking the products or services from your website to the corresponding Marketplace product or service pages. The disadvantage of this approach is that you may not land directly on the desired product or service in your Marketplace if you can only link to a ‘sales’ page. Also, your visitor will leave your website and will now be in your Internet Marketplace’s site. At least your visitor will be on your Marketplace page even if not in your own website.

Linking the products and services that you have in an Internet Marketplace such as eBay, Shopify or Etsy is usually possible, as long as you find out upfront the best way in which it can be achieved.

Please let us know if you have any comments, in the Comments Section below.

EverWeb on Social Media

You can also find EverWeb on the following social media platforms:

Facebook

Flipboard

YouTube

Twitter / X

Instagram

Integrate Your App In To EverWeb!

Thursday, June 23rd, 2022

When you create your website, you’re doing more than just creating your online presence. You are actually creating a hub for your online world that can, if you want, stretch across the whole of the Internet. The website that you have created in EverWeb can easily be used to extend the reach of your online universe through integrating your site with other apps. Increasing the reach of your site will give it more visibility, help better facilitate communication with your site’s target audience, helps get you more visitors and sales, as well as improving your SEO as well.

Integrating EverWeb with other apps and programs is easy and there is an ever increasing list of integrations to be found listed on the EverWeb site.

Here are just some of the ways you can integrate EverWeb with the rest of the electronic universe!

Email

Email has been a core feature of our lives for many a year, be it for work or for pleasure, email is an essential tool in our online world. Integrating with EverWeb is easy, just select the piece of text, or object, you want to link your email address to then go to the Hyperlinks Inspector. Click on the dropdown menu in the ‘Link To’ field then select ‘An Email Message’. Then all you have to do is to enter in the email address you want and the email subject. Once finished, publish your site and test!

If you have an EverWeb+Hosting plan you can also link you email to an external email app such as Apple Mail, or to an webmail client service such as Horde or Squirrel. To find out more about how to set up links to these apps and services, just go to the Site Publishing Settings screen in EverWeb and check out the links in the Email Addresses section. You can also find links for setting up email on our YouTube channel.

Adding Buttons To Your Site

The second way to integrate other apps and programs into your site is through adding buttons. EverWeb comes with 10 built in buttons that can be added to the pages of your site. The buttons listed are designed for use with email apps and social media, such as FaceBook, Twitter and Instagram. to add a button to your page, go to the Insert-> Button menu option. Choose the button you want from the list. You will then be asked to link the button to the associated app e.g. if you chose Twitter, you would add in your Twitter handle. The button by default is 64 x 64 pixels. To change the size of the button, it is best to select the button, then go to the Metrics Inspector. Check the ‘Constrain Proportions’ checkbox so the button retains its shape then change the height or width of the button as desired.

Start the Conversation with a Blog!

EverWeb’s blogging feature is a great way to expand on topics you don’t have space for in the regular pages of your site. It’s also a great way to announce events, sales etc. It’s also a great way to engage with your target audience in a way in which you can control through a Comments Section. EverWeb supports two Comment Engines: Disqus and FaceBook Comments. Once you have signed up for the service you want to use, just add the Disqus shortname or FaceBook App ID in to the Comment Options section of the blog Posts and you’re in business!

For more detailed information about which Comment Engine you should use, how to sign up for a Comment Engine and how to integrate your Comment Engine in to EverWeb, check out the chapter on blogging in the EverWeb User Manual.

Widgets, Widgets, Widgets!

Widgets are the ideal way in which you can integrate features from other apps and programs in to your website without having to leave EverWeb. Widgets also bring the most common features that you need in to one place so you can often be more efficient using the Widget Settings for e.g. the PayPal widget rather than searching through PayPal to find all the settings you need… Furthermore, widgets are often updated to add new and updated features from the original app. The PayPal widget in EverWeb 3.7, for example, gained a new discounts for order quantity feature that many users had requested.

If there’s an app that you want to hook into from EverWeb that’s not currently available, you can either ask us directly about it in the Feature Request page on the EverWeb Discussion forum, or check out the widgets that have been developed by third party widget providers such as EverWeb Garden and EverWeb Widgets.

Finding The Hook…

Sometimes finding a hook in to the app of your choice may not be easy. There are literally millions of apps out there, so it will always be the most popular apps that will have the best chance of a widget being developed. However, third party widget providers may also make a custom widget for you and there’s always another option: The HTML Snippet Widget.

Many apps have a way in which you can link to them through some user specific generated HTML Code. You then copy this code and paste it in to EverWeb’s HTML Snippet widget to establish the link that you need. So if you need to find the hook from EverWeb to your app, check out your app’s features to see if it offers this kind of linking.

EverWeb’s Contact Forms Enhanced Addon

If you use EverWeb’s Contact Form Advanced widget you may want to store and work with the data that you gather from your contact forms. You can easily link your contact form data using EverWeb’s Contact Forms Enhanced Addon. The data collected in the contact forms is stored securely and can then be exported Excel or CSV formats making contact form data analysis and mailing lists based on specific criteria easy to create.

integrating with EverWeb is usually incredibly straight forward. If you need to integrate your app with EverWeb but don’t know how, or if it is possible, let us know and we will see if we can find an easy way to make it possible!

EverWeb on Social Media

You can also find EverWeb on the following social media platforms:

Facebook

Flipboard

YouTube

Twitter / X

Instagram

Getting The Most From EverWeb’s Backup and Restore Feature

Thursday, March 17th, 2022

Backing up important files on your computer used to be an arduous task, but now there are more options available than ever before, and most of them are easy to use and hassle free. External SSD drives offer a great low cost option for backups (such as when used with software such as Apple’s Time Machine) and the availability of automatically backed up Cloud storage makes the possibility of losing our work less than ever.

The tools that we use such as word processors, spreadsheets and the like, also reduce the risk of losing anything more than a few characters or number entries though the use of Auto-Save features. So how does backing up, restoring and auto-saving work in respect to EverWeb? Let’s find out by first looking at the EverWeb Project file itself…

About EverWeb’s Project Files

When you create your website in EverWeb, its contents are stored in a ‘project’ file. When you create a new project, it is named as ‘New Website’ by default which you can easily change by using the File-> Rename Website menu option or by double clicking on the name ‘New Website’ in the Web Page List and entering a new name.

The name that you give to your project file in EverWeb is, in fact, an alias. Behind the scenes, the actual file name is made up of a unique, randomly generated, combination of letters and numbers, followed by a .everweb file extension.

You can see the actual filename of your project and where it is stored using the EverWeb’s Projects Window. To the right of your project name in the Recent Projects list, you will see an up/down arrow symbol. Click on this symbol, then select ‘Show on Disk’ from the dropdown menu. You will see your Project file name highlighted in the Library-> Application Support-> EverWeb folder of your Mac.

If you have your own backup software, you can backup this folder as part of your computer’s backup schedule.

Auto Save and Scheduled Backups

When you first purchase EverWeb, one of the first things we recommend you do is to set up a backup schedule within EverWeb in addition to any computer backup that you may already have set up. You can set up your own backup schedule using the EverWeb-> Preferences menu option then click on the Backup tab. Backups only take place when the project file has been opened, so be aware that this style of backup probably works in a different way to how your computer backup may work. This reason for this is that EverWeb takes a snapshot of your project file when it is open (i.e. before you quit EverWeb or close the project file) so if you need to restore, you can quickly open the most recent version of the file, or whichever copy you want. It is also probably easier and quicker to restore your Project file through EverWeb than have to search out the computer backup of the Project. We do though, still recommend backing up to the computer as well as within EverWeb so that you have a copy stored on a different device, in case, for example, your local hard disk goes down, then you still have a disaster recovery option.

The other option you will find in the Backup tab is Auto Save which is also invaluable. If you computer crashes you will likely only loose the last couple of keystroke or actions that you did in your Project file at most, so again, it is recommended that you keep Auto save enabled at all times.

‘On The Fly’ Backups

The other useful EverWeb backup option is to use the ‘On The Fly’ backup. This is ideal when you want to preserve your project at a particular point in its development, or if you are going to make wholesale changes to your site and want to keep a copy of the original project file in case you need to roll back your changes later. Again, just go to the Projects Window and click on the up/down arrows next to your project file name, then select ‘Make Backup…’ and follow the instructions. Quick and easy!

Restoring a Project File

Restoring a project file is as easy as making a backup. Just click on the up/down arrows of the project which you want to restore and choose which backup you want to restore from the list.

Note that this option only works when the project file is stored locally in EverWeb’s default project file location. If your project file is located elsewhere read on…

Project Files in Non-Default Locations

Many EverWeb users elect to move their project files to a Cloud drive, such as Apple iCloud, Microsoft One Drive or Google Drive. As well as making the project file available on any machine you may be working on, the other big advantage is that the project file will get backed up by the Cloud service you are using. As mentioned earlier, use the Show on Disk option to locate the project file you want to move to the Cloud then move it to its new location. You may want to put the file in a folder named after your project. Alternatively you can rename the Project file’s unique file name to your project file name if you want, just make sure to leave the .everweb file extension in place.

When using a Project file stored in a non-default location, you will notice that your Project file is no longer listed in the Projects Window when you launch EverWeb and that you will need to use the File-> Open (or File-> Open Recent…) menu option to open the Project.

If you want to restore your project file from your Cloud service, follow your Cloud service provider’s file restore guidelines.

If you are wanting to restore from a local backup, e.g. from Apple’s Time Machine, you will need to find where the Project file is located. Again, click on the up/down arrows to the right of your Project file in the Projects Window then choose the Show on Disk menu option. With the Project file highlighted, press Command+Spacebar and enter ‘Time Machine’. Double click on the Time Machine app, which will then locate all of the backup copies of your Project file from which you can choose to restore.

The other interesting point here is that if you have set up a backup schedule in EverWeb, a project stored in the Cloud will still be backed up by EverWeb on the local computer that EverWeb is installed upon. You can see this by going to the EverWeb-> Preferences-> Backup tab and clicking on the ‘Manage Cache Files’ button. You can use this dialog box to delete the backup if you want. If you want to restore the backup you will need to go to the You can see the actual filename of your project file and where it is stored using the Projects Window. To the right of your project name in the Recent Projects list, you will see an up/down arrow symbol. Click on this then select ‘Show on Disk’ from the dropdown menu. You will see your project file name highlighted in the Library-> Application Support-> EverWeb-> Backups folder of your Mac. Once you have located your project’s unique file name folder, double click on the .backup file within the folder to restore it. Note that doing so will restore the project to the local computer again.

Backing up and restoring EverWeb’s Project files gives you many different options to make sure that you never lose any of your work!

EverWeb on Social Media

You can also find EverWeb on the following social media platforms:

Facebook

Flipboard

YouTube

Twitter / X

Instagram

Using QR Codes in Your EverWeb Website

Thursday, January 6th, 2022

The humble QR Code was invented in 1994 by Japanese automotive company Denso Wave. QR stands for ‘Quick Response’ and is a two dimensional barcode. Whilst a barcode holds information horizontally, the QR code holds information both horizontally and vertically, so it can hold hundreds of times more information than the traditional barcode as well as being faster to read.

Today the use of QR Codes extends far beyond the automobile industry, although until fairly recently, has been limited mainly in use to print media. The use of QR Codes has traditionally been to direct people from printed media to digital media. So why would you want to use QR Codes on your website? Are there any advantages in doing so?

Using QR Codes in your website can be advantageous, but often their usage comes down to the type of business that you are running, such as event management, but other reasons to use QR codes also exist as we explore below.

Using QR Codes in Print Media

First of all, remember that QR Codes are primarily used in print media so you may want to add a QR code to any printed media you may have to link your customers quickly and directly to the pages in your website. The QR is a great marketing tool for your business.

Using QR Codes in Your Website

Additionally, you can also embed QR Codes directly within your site. Here are some reasons as to why you might want to…

  1. Social Sharing: The main advantage of using a QR Code in your site is that it can facilitate social sharing. This is particularly relevant and useful mobile device users. Adding a QR code in a blog post, or to a particular page in your site, can help make the social sharing of the post or page that much easier. For example, you could be with a friend and want to share an post with them. Just offer up the QR code to them to quickly and easily share the post.
  2. Cross Platform Sharing: QR Codes are a quick way to bookmark pages and/or posts which is extremely useful if, for example, you need to quickly store a page from your desktop browser on to your phone. QR codes can provide a simple, time saving way of transferring information from one device type to another.
  3. Sharing with Others: Sending a QR Code of your website page to a predefined list of users, or friends, is also super easy. It is also easy to retrieve later on if you need it
  4. App Downloading: Your website may also have links to one or more apps. You can use an app such as App Download QR Code to add a QR code link to your website making it easy for your visitors to download the associated app. When scanned, the QR code will open up the relevant App Store for your visitor, making the associated app available for download.
  5. Coupons and Offers: A QR Code in your site can also provide a way in which your visitors or customers can redeem coupons or take advantage of offers. Apps such as Coupon QR Code can be used to add such features to your website. Scanning the QR Code will then take your customer to the online store with the coupon code already applied.
  6. Entry and Access Usage: A QR Code on your site may help grant access to e.g. events that your company is hosting, to special access limited features on your site, or to external websites that may. be of interest to your visitors. .

To Use QR Codes or Not? That Is The Question…

It is likely that there will not be too many websites that will adopt the use of QR codes. QR Codes in websites is a big plus, though, when there is a specific case usage for them e.g. the granting access to events, where concessions are being offered online or where there is a specific marketing need to do so. QR Codes are also advantageous in social sharing situations where the quick and easy sharing or a post or page is needed.

EverWeb on Social Media

You can also find EverWeb on the following social media platforms:

Facebook

Flipboard

YouTube

Twitter / X

Instagram

EverWeb’s RSS Feed Widget Explained!

Friday, November 26th, 2021

When EverWeb debuted eight years ago, it came with a number of preinstalled widgets that mirrored those found in Apple’s defunct iWeb product. One of those widgets was the RSS Feed widget.

The acronym RSS has never had one fixed meaning so you may find it referred to as either Rich Site Summary, Really Simple Syndication or Really Straightforward Syndication. What RSS does, though, is clear – it enables you to easily access updates to website contents and display these updates in an uncomplicated way. RSS, therefore, is ideal for frequently updates blogs or news headlines or media that may get frequently updated such as podcasts, audio and video content.

Adoption of RSS in websites grew in the early 2000’s and there are many apps, such as Feedly and FeeddlerRSS, that you can use to subscribe to the RSS Feeds of your choice. These content aggregators make managing multiple RSS Feeds that much easier.

Why Use EverWeb’s RSS Feed Widget?

Using an RSS Feed app to view the latest content from your favourite feeds is a great way to consume content, but you can also add RSS Feeds directly in to your website using the RSS feed widget. This is useful if you want to, for example, let your visitors know that there is a new blog post available on your site. It is also a good way to link to content from other sites that may also be of interest to your visitors.

Adding The RSS Feed Widget To Your Page

EverWeb’s RSS Feed widget is a fixed width widget, so if you are using a Responsive Page Layout in your site, the widget will need to placed inside of a Responsive Row widget. If you need to add a Responsive Row widget to your page, first drag and drop the Responsive Row widget on to the page from the Widgets tab. Once the widget is on the page, you can name the Responsive Row, e.g. “RSS Feed Row” before drag and dropping the RSS Feed Widget on top of the “RSS Feed Row”.

If you are using a Centered or Left Aligned Page Layout, just drag and drop the RSS feed widget directly on to the page.

Finding the Feed URL

Once the widget is in place on the page, the next step is to add the Feed URL you want to the URL field in the Widget Settings. Some external websites publicise their RSS Feed link which makes it easier for you to add it in to your own site. If you cannot find the Feed URL link of the site you want, try one of the following URL formats:

  • https://website.com/feed/
  • https://website.com/category/feed/
  • https://website.com/tag/feed/
  • https://website.com/blog/rss.xml

It may take some time to figure out the Feed URL by intelligent guessing. If you have the technical ability you can also look at the target site’s source code to see if you can find the Feed URL, or you could simply ask the Website Owner instead which may be the easiest option!

If you are using your EverWeb blog as the Feed URL, the URL will follow the structure of your website so if the blog is on the top level of the website the Feed URL would be

https://www.website.com/blog/rss.xml

If you are an EverWeb+Hosting customer who has purchased EverWeb Site Shield Addon, you would use HTTPS, otherwise use HTTP at the start of the URL. Also note that the name of the blog is the default name in EverWeb. If you have changed the blog page name, you will need to use your replacement name instead of “blog” in the URL.

Styling The RSS Feed Widget

Once you have entered a valid URL in to the Feed URL field, the widget will update. This may take a few moments. By default five entries will be displayed. Each entry consists of a Title and the first 150 characters of the entry’s text. You can change these values in the Widget Settings as desired.

Styling the contents of the RSS Feed Widget is easy. In fact, styling the widget is done in the same way as you would for the Blog widget in your EverWeb blog’s index and archive pages. Let’s start with the Titles of the entries. By default, the Titles are in a blue color and underlined. This is because the Titles are in fact Hyperlinks to the entries themselves. So to style the Titles, first click on the first title in the Widget. All the Titles will become highlighted. Now go to the Hyperlinks Inspector and change the color and underlines as you want. If you want to change the Title text font and size, click on the Fonts button in the Toolbar, or use the Command+T shortcut key.

To style the text content or the Date (if you have checked the Show Date checkbox in the Widget Settings), click on the text content or one of the dates in the Widget. As with the Titles, all of the text or date entries will become highlighted. Use the Fonts Panel to change the color, font and font size of the selection.

Use the other Widget Settings to select the Style of the Widget itself. You may also want to adjust the refresh rate of the widget. This will depend on how often the RSS Feed content is updated. If the content is frequently updated, use a smaller value in this field. If the content is not updated often use a larger value.

In summary, EverWeb’s RSS Feed widget is a versatile and very handy widget to keep your visitors up to date with the content of your site.

EverWeb on Social Media

You can also find EverWeb on the following social media platforms:

Facebook

Flipboard

YouTube

Twitter / X

Instagram

Adding Apple Podcasts To Your Website in EverWeb

Thursday, December 10th, 2020

When using Apple’s Podcast’s app on iPhone, iPad or on your Mac (or via iTunes depending on your macOS version) you can search, listen and download thousands of podcasts. If you want you can add these such podcasts from the Apple Podcast app in to your own website!

Finding The Podcast You Want

The resource to use to find the podcast you want to use is Apple’s Marketing Tools website. This website contains a number of different marketing resources for a variety of Apple’s services such as News, Apple TV, the App Store and so on.

Click on Apple Podcast Toolbox to access the Podcast Marketing Tools Portal.

To start, enter the name of the podcast that you want to embed in your website. This could be, for example, a specific podcast name or just the name of the podcaster.

In this example, I want to embed a podcast about the iPhone 12 that I recently listened to from the Apple Insider website. In this case, I just enter Apple Insider in the search box and press Enter.

In the results I can see Podcasts and Podcast Episodes. ‘Podcasts’ are like categories. Apple Insider has three categories. Each category will, therefore, contain Podcast Episodes. I can filter the search results by Type of Podcast and by country if I want to but in my example it is not necessary to do so.

As I want to find a podcast episode about Apple’s iPhone 12 I start by clicking on Apple Insider’s general Podcast category. On the next screen is a list of Podcast Episodes. Once I have located the podcast episode that I want, I just double click on its title. If you do not see the podcast you want, expand the section by clicking on ‘Show More Episodes’.

Podcast Embedding Options

You will now be on the Podcast Episode page which contains a number of different sections. For our purposes, we are interested in three sections: Content Link, Podcast Player and Short Link. We will look at each of these options and how to add each of them in to your EverWeb made website project.

Content Link

A Content Link is the hyperlink to the podcast episode you have elected. The link is the full URL All you need to do in the instance is to copy the Content Link to the Clipboard using the ‘Copy Link’ button.

Once you have copied the link, go to the place in your EverWeb Website where you want to add the link. For example, you could attach the link to a piece of text, an image, or a button. In this example, I am going to attach the link to a piece of text in my page. 

Highlight the Text that you want to use, then go to the Hyperlinks Inspector.  Click on the box to the left of text ‘Enable as hyperlink’ to enable the settings. Next, click in the ‘Link To’ field and select ‘An External Page’. If you would like the podcast to open in a new page when your visitor clicks on the link text, select ‘Open in new window’ as the Behavior. The last step is to click in the ‘URL’ field and paste in the link to podcast from the Clipboard.

You can customize the link formatting using the Hyperlink Formatting section. Once you have finished your customizations, use Preview from the Toolbar to test the link.

Short Link

To use a podcast episode Short Link in your website, start by clicking on the ‘Generate Link’ button in the Short Link section of the Podcast Episode page. When the link has been generated, you will see it displayed on screen. Use the ‘Copy Link’ button to copy the Short Link to the Clipboard. 

Next, follow the instructions from the Content Link section above to add the Short Link in to your EverWeb made website project, then test the link using Preview.

Short Link is sometimes used if it is not possible to paste long links in to your site. This is not a limitation in EverWeb so you can use either option. There may in fact be valid situations where you may want to use a Short Link to mask the full address. 

The advantage of using Content Link over Short Link is that the Content Link generally tells you the name of the podcast episode whereas the Short Link is only a randomly generated link name.

Podcast Player

The last option for embedding podcast episodes in to your website is by using the Podcast Player option. Use this option when you want to embed Apple’s Podcast player in to your website. The Podcast Player can be customized to have a light or dark background, and the player can be specifically sized if required. Additionally, the player has a ‘See more’ option so that visitors can explore more podcast episodes from the podcaster.

To use the Podcast Player, simply click on the ‘Copy Embed’ button to copy the embed code to the Clipboard. Next, go to the page in your EverWeb project file where. you want the player to be embedded. 

In this instance you will need to use EverWebs HTML Snippet widget, so go to the Widgets tab and drag and drop the widget on to the page.

Click inside the HTML Code Box and paste in the Embed Code from the Clipboard. Click ‘Apply’ to finish. If you do not click on Apply, the code will not be saved in the Code Box.

You will not see any change in the Editor Window once the code has been applied, so use Preview to test that the embed code works correctly before publishing your site. Using Preview in this instance is also useful as you can see if the Podcast Player is positioned correctly on your page.

Adding podcasts from Apple’s Podcast repository is easy and has the flexibility for you to add them to your website in exactly the way in which you want them displayed. For a video walkthrough of this EverWeb feature, just click on the image at the top of this page!

EverWeb on Social Media

You can also find EverWeb on the following social media platforms:

Facebook

Flipboard

YouTube

Twitter

Instagram

Stylish Navigation Menu Widgets from EverWeb Garden

Thursday, October 15th, 2020

As you may know already, EverWeb Garden is a new third party provider of EverWeb widgets. To launch their site, EverWeb Garden offered EverWeb users their initial batch of over 60 widgets for free. This offer has now been extended for a limited time! If you missed out the first time round, you now have another chance to get an assortment of dynamic, professionally designed third party widgets absolutely free.

One type of widget that is always in demand is website navigation widgets, so in this post we will be reviewing six EverWeb Garden navigation widgets. All the widgets reviewed below can be used on either fixed width (centered or left aligned) page layouts or in a responsive page layout unless otherwise stated.

Fading Navigation Bar Widget

The Fading Navigation Bar widget is a simple widget that can change its colors as you scroll down the page. This adds an interesting way to keep the navigation menu prominent when your visitor scrolls the page. The effect can be applied to both simple and hamburger style navigation menus. When using the Hamburger menu option, the dropdown menu items are displayed in the center of the page with an ‘X’ to close the navigation in the top right hand corner. It is a nice, clean look for your navigation.

In addition, you can add your own logo to the navigation as well as a button which has the option to change its own color as you scroll the page. The button can be used in both simple and hamburger style navigation menus. A button can be useful as a ‘Call To Action’ highlighting e.g. special offers or limited time online sales etc. to your site’s visitors.

Fading Navigation Bar Pro Widget

The second widget in this review is the ‘Pro’ version of the Fading Navigation Bar widget. As with the regular version of the widget, simply add the pages that you want to the navigation using the ‘Add’ button. In the Pro version of the widget you can add dropdown menu items to the navigation. You can add any page in your site to any dropdown menu. The Dropdown menu feature also has its own styling options so that you can create exactly the look that you want to match with your website’s design.

Slide Out Navigation Widget

The Slide Out Navigation widget is a popular style of navigation seen in many websites as it offers a clear and simple menu style that slides out only when activated. This feature helps keeps your page design clean and simple in appearance.

The widget works in a simple way. Just drag and drop it on to the page and you will see a ‘Hamburger’ icon displayed. You can change the color of the hamburger itself, its background and the font size and style that the navigation uses. The width of the navigation can also be adjusted as desired.

You can add your own logo to the top of the slide out menu and adjust its sizes required. The navigation can slide out from either the left or right side of the screen and the navigation’s text can be left, right or center aligned. The smooth fly out animation effect adds a nice quality element to the widget.

In addition to the above mentioned options, you can add a button to the bottom of the slide out menu. This is great for when you want to highlight, for example, links to ‘terms and conditions’ pages, sales pages and so on. As you would expect, the button itself is fully customizable so you can match it up perfectly to your site’s own design style.

Mobile Menu Widget

The Mobile Menu widget is a variation on the Slide Out Navigation widget, however, this widget allows you to link to pages within your project file, to external pages and even to file types such as PDF files. The Hamburger icon can be customized including its size which can be adjusted just by dragging the icon’s grab handles or by using the Metrics Inspector.

This Mobile Menu Widget has many options available to it such as how you want the navigation to be displayed: as a dropdown, slide overlay, slide push or as a popup. You can even add a search field to you navigation menu!

Navigation Bar with Icons Widget

The Navigation Bar with Icons widget give you a really nice way to create menus that look like, for example, EverWeb’s Toolbar. The widget includes eight built in icons or you can use icons from Font Awesome which has plenty of free to use icons to choose from! You can customize the widget’s text fonts, set top and bottom margins and even the maximum width of the navigation. The Navigation Bar with Icons Widget is a simple, but really effective navigation combining text and icons!

Hidden Navigation Bar Widget

The final widget in this review is the Hidden Navigation Bar Widget. This is a fixed widget that hides itself once you scroll down to a predefined location on the page. As with some of the aforementioned widgets, you can also add a button to the navigation menu and there is full customization available for the navigation as you would expect.

EverWeb Garden’s navigation menu widgets provide a great way to add modern styles and variety to your website’s navigation. The full range of third party EverWeb Garden widgets is still available for free for a limited time only on their website. If you have any questions about these, or any other widget provided by EverWeb Garden, please contact them directly via their website.

EverWeb on Social Media

You can also find EverWeb on the following social media platforms:

Facebook

Flipboard

YouTube

Twitter

Instagram

Integrating Gumroad with Your EverWeb Website

Friday, September 4th, 2020

Gumroad is a website that brings ‘super simple commerce to creators’. Creatives specialising in films, courses, music, books, comics and other genres use Gumroad to easily sell their products on line.

Gumroad includes a simple set up, a heavily optimized purchase experience and backend tools to analyse your sales data, manage your customers and build your audience.

Integrating Gumroad with EverWeb

Integrating Gumroad with your EverWeb website is easy as there are a number of ways in which you to do this. Such flexibility means that you can sell your products in whichever way is best for your existing and potential online audience. If you want, you can also sell physical goods as well.

When you begin using Gumroad, you will first add a product to your profile. When you add your first product, you will eventually come to the Share Your Product screen…

If you have previously added a product, go to the Products menu, then select the product that you have already added, then select the Share menu option.

There are three ways in which you can link to Gumroad from within your EverWeb website.

Using a URL Link

The first method is by adding a URL link in to your site. Use the ‘Copy URL’ button in the ‘Share your product’ screen to copy your product link to the Clipboard. 

Next go to your page in EverWeb where you want to place the link. You can use a EverWeb’s Hyperlink Inspector to link the Gumroad URL to a piece of text or an image, or you can add the link to a link button in, for example, the FlexBox Widget.

When using the FlexBox widget, select the Embedded Object that you want to attach the link to in the Widget Settings. Next, scroll down to the Link button in the Button Settings section of the widget. Click on the ‘Link’ button and paste the Gumroad URL in to the URL field. Click OK to finish then preview, or Publish, your page to test the button.

Using Gumroad’s Overlay Widget

The second option is to use Gumroad’s Overlay widget. Using the Overlay widget allow your website to have inline purchases without having to leave your site. You can customize the widget’s button text and there are also options to automatically trigger a payment form and to allow single product purchases.

Once you have set your text and options, click on the ‘Copy’ button to copy the generated code to the clipboard 

Next go to the page in EverWeb where you want to add your product. If you are using a Responsive Page Layout, you will first need to have a Responsive Row widget on your page. If you do not have this widget on your page, drag and drop it on to the page and position it where you want it.

With the Responsive Row widget in place, go back to the Widgets tab and drag and drop the HTML Snippet widget on to the page. In the HTML Code box of the widget, paste in the code from the clipboard. Click on the ‘Apply’ button when done. The Editor Window will update. Preview or publish your site to test.

Using the Gumroad’s Embed Widget

The last option is the Embed widget which lets you embed your products in to your website. This is also a useful option if you do not have an HTTPS website. 

Select the Embed widget option and, as before, use the ‘Copy’ button to copy the code to the clipboard.

As with the Overlay widget option above, you will again need to drag and drop an HTML Snippet widget in to a Responsive Row widget on your page. In the HTML Code box, paste the code from the clipboard and press ‘Apply’ to finish. The Editor Window will update. Preview or publish your site to test. 

If you are using a Centered or Left Aligned page layout, you can add the HTML Snippet widget anywhere on your page. The Responsive Row widget is only needed for the HTML Snippet widget when using a Responsive Page Layout.

Watch The Video

Check out the link below for a video walkthrough that shows you how to link your Gumroad products in EverWeb.

EverWeb on Social Media

You can also find EverWeb on the following social media platforms:

Facebook

Flipboard

YouTube

Twitter

Instagram

Add Shopify Buttons To Your EverWeb Website!

Friday, May 29th, 2020

Shopify is an online platform that helps build your business ‘all from one place’. Shopify aims to help you with all aspects of your online business from sales and marketing to support and management. It is an approach that now reaches over 1,000,000 businesses in 175 countries. 

Although Shopify offers a one stop shop for online businesses, this may not always be the best option. Many established online businesses may just want to use Shopify only to increase their market reach. Other businesses may prefer not to put all of their resources in to one platform in order to reduce business risk and increase business resilience.

Integrating Shopify with EverWeb

Integrating Shopify in to your EverWeb website is best done through Shopify’s Buy Buttons as they can be directly added in to your website’s pages and blogs. The buttons can include images, a description of the product and the price of the product. If you update your product in Shopify, the The Buy Button in EverWeb will also be updated.

Before You Begin…

There are a couple of things that you should check before starting to add Shopify Buy Buttons to your EverWeb website

  1. You have products in your Shopify Admin and
  2. These products are available to the Buy Button Sales channel. 
  3. Shopify Payments has been activated. If this feature has not been activated, a transaction fee will be levied against each customer purchase that uses a Buy Button.

Adding A Shopify Buy Button To Your Site

There are two forms of Shopify Buy Button: for one product (and all is variations) or for a Collection. 

To create a Buy Button for one product

  1. Log in to Shopify then go to the Shopify Admin screen
  2. Click on ‘Buy Button’. Choose the option to ‘Create Buy Button’. In this example choose ‘Product Button’ as this button will be for one product only.
  3. Next select the product that you want to use the button with from your catalog. The search function can be used to quickly find the product you want if you have a lot of products in your catalog.

Buy Button Customization Options

The next step is to apply customization options to the button. Where you have different variations for your product, you can choose to select either ‘All variants’ or select just one variant.

The color of your Buy Button, its size and its font are all customizable. Any changes you make can be previewed at any time.

Choosing The Buy Button Layout Style 

For the Buy Button layout, you have three options to choose from:

  • Basic: Only the button itself is displayed. 
  • Classic: The button is displayed with a product image and price
  • Full View: The button is displayed with a product image, price and description.

Once you have selected the button layout of your choice, the next decision you need to make is to decide what you want to happen when the customer clicks on the button. Again, there are three options:

  • Add Product to cart
  • Direct to checkout
  • Open product details

The last option, Open product details, allows customers to view the product description, select any available product variants, and add the product to the shopping cart. If your product has multiple images associated with it, these will also be displayed. This Open product details type will not available if the ‘Full View’ layout style has been selected as it includes these details already.

Note that when a customer clicks to go to the Checkout, Shopify will by default, open a new browser window. If you do not want this, go to the Advanced Settings and change the ‘Redirect in the same tab option’.

Click on ‘Next’ to complete the Buy Button setup!

The final step is to click on ‘Copy Code’ which will copy the Buy Button code to the Clipboard which you can then use in EverWeb.

Creating Buy Buttons For Collections

If you have products in a Collection, creating a Buy Button will add a button for each product in the collection. The collection’s Buy Buttons can be customized in the same way as for single product buttons.

Adding Buy Button Code Into EverWeb

The last step in creating the Buy Button was to copy the button code to the Clipboard. You can now use this code in your EverWeb website project file.

  1. Go to the page in your website project where you want to add the Buy Button.
  2. In the Widgets tab in the Inspector Window, drag and drop the HTML Snippet widget on to the page.
  3. Click inside the ‘HTML Code box’ then paste the code from the Clipboard.
  4. To make sure that the changes are applied you must click on the ‘Apply’ button. You will see that the Editor Window will be updated.
  5. Size anYou can now move and position your ‘Buy Button’ around the page as desired.
  6. When you have completed your changes, publish and test your website.

EverWeb on Social Media

You can also find EverWeb on the following social media platforms:

Facebook

Flipboard

YouTube

Twitter

Instagram