WebDesign HTML Editor QuickStart Guide
Thank you for choosing WebDesign, the fully featured web authoring package and HTML Editor for the Mac. This quick start guide will get you up and running and get you familiar with some of WebDesign's features. It should only take you about 15 minutes to get through and if you have any further questions or need help in any area feel free to post a message on our free discussion forum at http://www.ragesw.com/forums/.
Download the PDF version for a more indepth tutorial!
| Next |
From Installation to Introduction
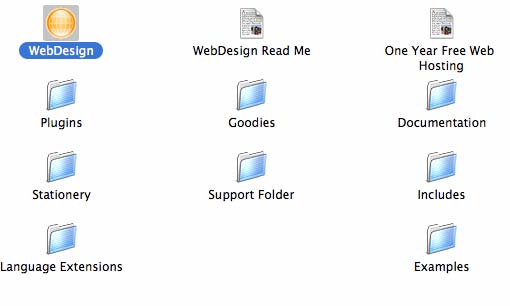
The first thing you should do is place WebDesign in your Applications folder. Drag the entire WebDesign folder from the Disk Image and drop it into your Applications folder. Next open the WebDesign folder and launch the WebDesign application by double clicking it.
The first thing that will happen when you launch WebDesign is you will see the 'New Document' window as shown below. From here you can enter your web page title, your name as the author of your web page as well as appearance options and JavaScripts if you have any. The 'Meta Data' field will let you enter your web site description and keywords that will be recognized by search engines. The 'Examples' section will allow you to start a new document based on the example you have selected. There are also template files you can use to base your web page on in the 'Examples' tab. If you do not wish to enter any information, you can start with a blank document by pressing the 'Blank Document' button.
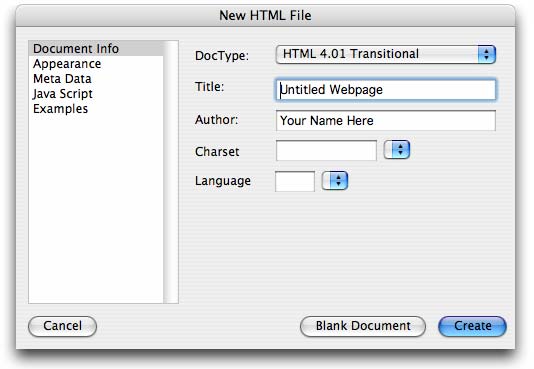
Use the 'New Document' window to set the default information for your web page. Or use the 'Examples' section to base your web page on an example or template.
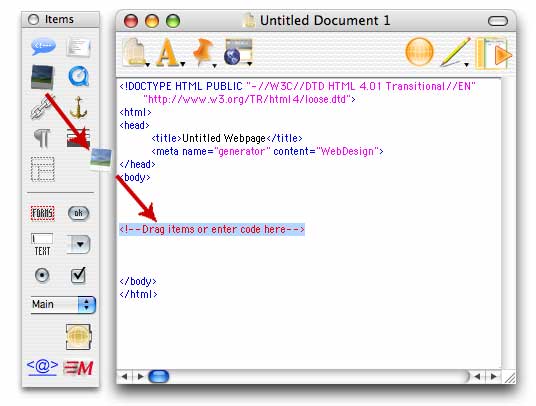
After you have entered all your information press the 'Create' button to create your web page. A new document window will appear which will look like the picture below. You can start developing your web site by typing html code in-between the <body> and </body> tags;

You do not have to just type code, you can also drag tools from the 'Items' window on the left hand side or use the 'Insert' menu at the top of your screen to access all of WebDesign's built in wizards.
The wizards that appear allow you to enter information about the tag without you having to know the actual HTML syntax. They also have a reference for the specific tag you are trying to use which can be accessed by pressing the '?' button in the lower left hand corner.
WebDesign also contains many other features to help you write your HTML code. The 'Attribute Editor' will list all the attributes for a specific tag as well as access the HTML reference if you are unsure what a specific tag or attribute does. To use the attribute editor, simply click within an html tag in WebDesign's editor to have its attributes listed. If the attribute editor is not shown, you can open it by going to the 'Window' menu and selecting 'Show Attribute Editor'.
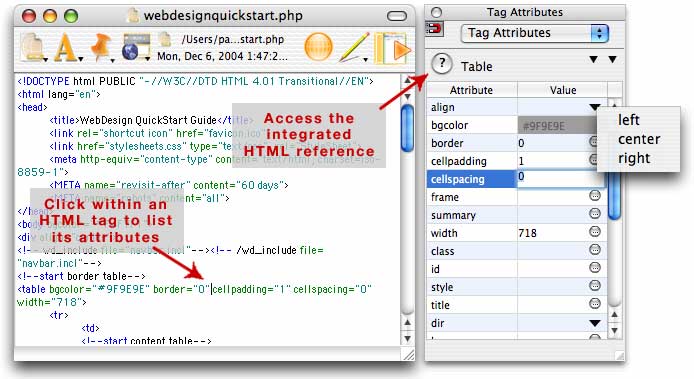
WebDesign's 'Attribute Editor' lets you easily select colors using Apple's Color picker and automatically generates the HTML color code for you as you can see with the bgcolor attribute. It also lists all possible values for certain attributes such as the align attributes which only accepts 3 specific values. Other attributes have the 'More Text' button which opens a new window so you can easily add lengthy text to certain attributes instead of typing it in the 'Value' cell of the attributes list.
Helpful Tips for Working with WebDesign
Here are some tips that will show you some of the features of WebDesign that can help with coding;
- WebDesign's text editor is very customizable. You can show line numbers to quickly and easily find errors in your document, you can Auto Indent text, which is enabled by default, so that each new line starts at the exact same amount of tabs as the previous line, you can even adjust the soft wrapping options (which wraps the text once it has reached a certain point, or the end of the window so that you do not have use the horizontal scrollbar) to hard wrap the text (which only creates a new line when the return key is pressed).
The image below shows you how to set some of these options, or you can open the 'Document Settings...' dialog to customize the editor even more. - You can easily switch between all opened documents by going to the Windows menu and selecting 'Next Window' or use the keyboard shortcut to do this quickly (Command-`)
- Creating a link in WebDesign that allows visitors who visit your site to get to other pages is easy. Simply drag and drop the 'Link' wizard from the 'Items' window or go to the 'Insert' menu and select 'Link...'. However, WebDesign makes things even more convenient for you by filling in the 'Text' portion of the 'Link' wizard with the currently selected text. So if you want to link to a certain document and place the link around some text that is already typed in your document, highlight it and open the 'Link' wizard from the 'Insert' menu.
- Drag and drop image files onto WebDesign's editor wherever you want to place them in your code. WebDesign's 'image' wizard will open and fill in the source ('src') attribute and get the dimensions of the image for you. If you drop any other kind of file besides an image file, WebDesign's 'Link' wizard will open up with the 'href' attribute pointing to the file.
- You can quickly open any file that is linked in your document. This means normal links such as '<a href=', style sheets linked to your document by the 'LINK' tag, scripts linked to your document from the 'SCRIPT' tag, any frames, image map links or even 'WebDesign Include Files'. Just click within an HTML tag that links to another document and either go to FIle->'Open Linked Document' or control-click and select 'Open Linked Document'. Whether you use an absolute path (file:///...) or a relative path (a path that points to the linked file relative to the current document), WebDesign will search your hard drive and open it in WebDesign for you.
- If you are only working on a certain portion of a document or don't want to be bothered with certain code you can condense (or collapse) it by selecting the text and going to the Text menu and selecting 'Condense Selected Text' (COMMAND-E)
- Don't forget about the plug-ins available to you. There are a bunch of Cascading Style Sheet plug-ins and JavaScript plug-ins included with the WebDesign Download. Plug-ins can be accessed just like the wizards. Notice the Popup menu at the bottom of the 'Items' window. This popup menu lets you select the different types of plug-ins. Just drag the plug-ins into your document like you would any other wizard. You can even download more plug-ins from the WebDesign Resources Web Site at http://www.ragesw.com/community/ for free.
- Language extensions are another powerful feature of WebDesign. As you start to expand into more web languages and build more complex web sites, Language Extensions will really come in handy. Built in are Cascading Style Sheet Language Extensions along with access to a help References, HTML Language Extension, JavaScript Language Extension and an ASP Language Extension. More Language Extensions can be downloaded from the WebDesign Resources Web Site at http://www.ragesw.com/community/ for free.
- Find more helpful tips and tricks by going to the application menu in the upper left hand corner on Mac OS X or the Apple menu in Mac OS 9 and select 'Show Random Tip...'.


Copyright 1999-2026 RAGE Software. All Rights Reserved.
About Us | Privacy Policy | Disclaimer | Support | Affiliate Program | Newsletter | Sitemap | Mac SEO Blog