
EverWeb’s Blog and Archive Pages Explained!
May 13th, 2025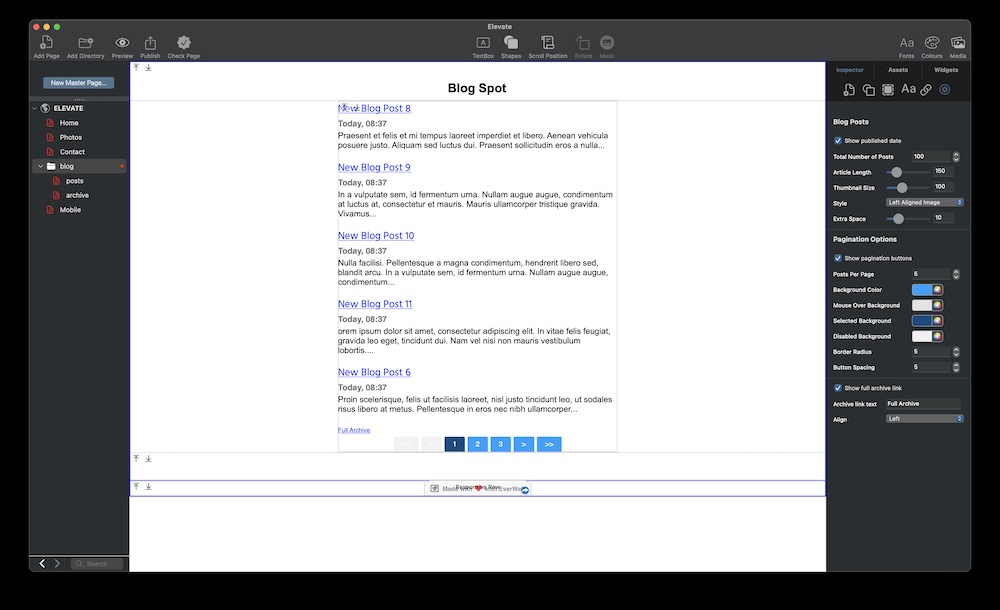
In our previous posts about blogging in EverWeb we looked at how to prepare for starting your own blog, how to add a blog to your EverWeb project and how to take advantage of all of the features of the ‘posts‘ page to create the perfect post.
In this post we are going be looking at the two other pages that are contained in an EverWeb blog: The ‘blog’ page and the ‘archive’ page.
The Blog and Archive Pages
Historically, the blog page is used to list your most recent posts, with the most recent post at the top of the list, the second most recent listed next and so on. The blog page only contains your latest posts so that your visitor can see what is recent and new. The archive page, on the other hand, lists all of your blog posts. Structurally, the two pages are almost identical as both of their functions is to display a list of blog posts.
Looking Familiar…
The blog and archive pages share the same widget on their pages with the blog page having one extra option, the ability to link to the archive page. If you use EverWeb’s RSS Feed widget, you will also notice that it looks quite similar to the blog and archive pages widget. This is not a coincidence as the RSS Feed widget links to RSS Feeds that display article links in descending order, e.g. new articles, or blog posts! Indeed, you can also use the RSS Feed widget in your site e.g. on your home page, to show your visitors links to your latest blog posts.
Blog and Archive Page Features
As you may already know, you can add a blog to your site using either a fixed width, center aligned page layout, or as a Responsive page. Once you have added the blog to your site, click on the blog widget that is displayed on the page so access its Widget Settings.
The first option is a checkbox to toggle show/hide the posts published date. The second option is for the ‘Total Number of Posts’ that you want to see within the widget. The default is set to 10 but you might want to increase this to account for the actual number of posts that you think you will make over time, e.g. 100. This number should always be higher than the value you use in the ‘Posts per Page’ field as it does not make sense to have, for example, the total number of posts set at 10 whilst you want to display 25 posts per page.
The next field is ‘Article Length’, which allows you to set how many characters of the post that you want displayed within the widget. Setting this value may be important so that you give enough text of each post to catch your visitor’s attention. The same applies to making the post title interesting to entice your visitor to click on the blog post link!
The next field, ‘Style’, deals with image alignment within the widget. The image itself is used it taken from the blog post’s ‘Post Image’ field. You can choose to display ‘Just Text’ (so no image displayed), or have the image as either on ‘Top’ of the post, ‘Left Aligned’, ‘Right Aligned’ or as a ‘Cover’ which displays the image above the post and centered.
The last option in the first section of the Widget Settings is ‘Extra Space’ which allows you to choose how big a gap you want between each post that is displayed.
Pagination Options
The second section of the Widget Settings, Pagination Options, is where you set up the widget’s pagination. If, for example, you have 30 posts and have set up the widget to display five posts per page in the widget, you will have a total of 6 pages that can be accessed in the widget. Pagination options allow you to click on any of the 6 pages using buttons at the bottom of the blog widget. You can also step through the widget’s ‘pages’ or jump to the first or last page with just one click.
To activate this feature, check the ‘Show pagination buttons’ checkbox. Once you have done this, you will see buttons displayed at the bottom of the widget. Use the color swatch or color wheel to set the colors as you desire. Additional options allow you to specify corner border roundness and the spacing between buttons.
The last part of the Pagination Settings section is only available on the blog page. This is the option to show a link to the blog post archive page. If you check the ‘Show full archive link’ checkbox, you will see the link displayed above the pagination buttons. You can name the link as you desire and you can also set its position to be either Center, Left, or Right aligned.
Styling The Blog and Archive Pages
After setting up your blog and archive pages how you want, the final step in setting up the blog and archive pages is to style the widget on the page as desired. All you need to do here is to double click on what you want to style in the Editor Window. For example, if you want to style the Title, double click on any one of the titles in the widget. All titles will now be highlighted. Use the Fonts panel to choose the font style, font color and font size that you want to use. Repeat this operation for the Date and body text fields, as well as the pagination buttons, as desired.
EverWeb’s blog and archive pages are easy to set up and customize so that they fit in to the look of your website. When you have completed setting up your blog, preview or publish to see the results!