What’s NEW in EverWeb 4.5: Object Pinning, On Click Actions, Carousel Widget, Popup Windows and Much More…

July 7th, 2026

We are thrilled to announce the immediate release of EverWeb version 4.5 for macOS and Windows. Our latest update is one of our biggest releases yet! On-Click Mouse Actions, Popup Windows, Object Pinning, Background Masks, Overlay Effects and the all NEW Carousel Widget are just some of the brand new features that we’ve added to this release. Check out the full list below!

We’ve also added lots of improvements based on your feedback as well as the usual fixes. See below for the full list of what’s new, updated and fixed our latest EverWeb release.

Which Version of EverWeb is for You?

EverWeb 4.5 is available to you on the following Operating Systems:

  • If you are running Microsoft Windows 10 or 11.
  • If you are running an Intel Mac running macOS High Sierra, Mojave, Catalina, Big Sur, Monterey, Ventura, Sonoma or Sequoia.
  • If you are running an Apple Silicon Mac running macOS Ventura, Monterey, Big Sur, Sonoma, or Tahoe, EverWeb will run natively without the need to use Rosetta 2.

Older Operating Systems can run the following versions of EverWeb:

  • If you are running OS X 10.10 – macOS 10.12 (OS X Yosemite, OS X El Capitan, macOS Sierra) EverWeb 3.4.2 is for you.
  • If you are running OS X 10.7 – 10.9 (Lion, Mountain Lion, Mavericks) EverWeb version 2.9.1 is available for you.

EverWeb 4.5 Includes…

[NEW] Customizable Popup Windows: Create visitor-facing popup windows with full design control.
• Show a popup immediately, after a delay, at a scroll position, on exit intent, when an object is clicked, or anchored beside another object.
• Display popups in the center, corners, edges, fullscreen, full-height panels, or push-content layouts.
• Customize overlay color and transparency.
• Prevent a popup from appearing again using browser cookies with configurable expiration.
• Allow visitors to close the popup by clicking outside it.
• Lock page scrolling while a popup is open.
• Manage popup windows from the new Popup Windows menu and toolbar.

[NEW] Mouse On-Click Actions: Add interactive On-Click Actions to any object on your page.
• Show, hide, or toggle other objects.
• Open popup windows or popup windows anchored to the clicked object.
• Control videos including play, pause, stop, mute, unmute, and volume controls.
• Control Carousel widgets.
• Move or resize objects when clicked.
• Scroll objects into view.
• Display alert messages.
• Chain multiple actions together with optional delays.
• Supports keyboard accessibility using Tab, Enter, and Space.

[NEW] Carousel Widget: Create responsive carousels containing text, images, videos, widgets, containers, and other page content.
• Auto-play slides with configurable timing.
• Pause playback when the mouse hovers over the carousel.
• Swipe, arrow, and pagination navigation.
• Slide, fade, flip, and card transitions.
• Looping, centered slides, spacing controls, and multi-slide layouts.
• Custom navigation buttons.

[NEW] Containers can now use either Auto Height or Fixed Height.
• Auto Height automatically adjusts to fit content.
• Fixed Height maintains a specific height.
• Auto Height supports minimum and maximum height limits.

[NEW] Objects inside row and column containers can now be positioned freely without affecting the layout of other objects.
• Free-positioned objects can be pinned to container edges.
• Other objects continue to use the container’s layout settings.

[NEW] Pin Objects to Containers or Browser Edges: Keep objects fixed relative to a container or the browser window as the page resizes.
• Pin objects to the top, bottom, left, right, or center.
• Use pixel or percentage offsets.
• Constrain objects to opposite edges so they always stay within the page bounds

[NEW] Every object can now be assigned a custom name.
• Rename objects from the Inspector, the right-click menu, or directly on the design canvas.
• Hidden objects are easier to locate from the right-click menu.

[NEW] Apply SVG masks and gradients to shapes and popup windows.
• Includes a built-in SVG mask library.
• Rotate masks directly from the mask picker.
• Works with shadows and border radius settings.

[NEW] Apply visual effects directly to any object on your page
• Blur
• Brightness
• Contrast
• Saturation
• Hue
• Sepia
• Invert
• Grayscale

[NEW] Image Focus Area Controls: Choose the most important part of an image when using Scale to Fill.
• Images remain focused on the selected area at all responsive breakpoints.
• Includes a dedicated Focus Area editor.
• Supports clearing and editing focus areas at any time.

[NEW] EverWeb can now export multiple image sizes for responsive websites, reducing download sizes on smaller devices.

[NEW] HTML Code widgets can now run inside an isolated iframe so that custom code doesn’t affect other objects
• Prevents custom code from affecting the rest of the page.
• Automatically enables iframe mode when needed.
• Supports automatic height adjustment.

[NEW] Projects now remember your workspace layout.
• Window size and position.
• Open folders.
• Selected page.
• Horizontal and Vertical Splitter positions.

[NEW] Set minimum and maximum width and height values for shapes, including minimum widths for full-width objects.

[NEW] Set a maximum content width for Containers

[NEW] New Align and Distribute controls have been added to the Metrics Inspector.

[NEW] Validate Footer Code directly from Site Publishing Settings.

[NEW] Hide responsive sections at specific breakpoints.

[NEW] Widgets now support shadows, borders, and picture frame styles.

[NEW] You can now set a Show On Device value for Ultra Wide desktop screens

[NEW] You can set now a Desktop Breakpoint value to separate Desktop and Ultra Wide Desktop screens

[NEW] If you are having publishing issues, you can now generate a Publishing Diagnostics report to help troubleshoot the issue from the Help-> Publishing Connection Diagnostics menu option.

[IMPROVED] Faster Container and Responsive Row resizing.
[IMPROVED] Better layout update performance throughout the design canvas.
[IMPROVED] Older projects now default Containers to Fixed Height mode for compatibility.
[IMPROVED] Improved drag-and-drop feedback when working with Containers and Carousels.
[IMPROVED] Improved support for nested Containers and deeply nested child objects.
[IMPROVED] Improved handling of free-flow objects inside Containers.
[IMPROVED] Improved support for wrapped Container layouts.
[IMPROVED] Improved support for always-on-top child objects inside Containers.
[IMPROVED] Faster object loading when opening pages.
[IMPROVED] Faster page switching in large projects.
[IMPROVED] Improved .htaccess generation for redirects and publishing settings.
[IMPROVED] Improved sitemap generation when page extensions are removed.
[IMPROVED] 404 pages now return proper HTTP 404 status codes.
[IMPROVED] Improved image optimization for responsive websites.
[IMPROVED] Improved image export accuracy across responsive breakpoints.
[IMPROVED] Improved handling of rotated images on Windows.
[IMPROVED] Improved publishing accuracy for Master Page objects from older projects.
[IMPROVED] Improved Google Font generation when fonts are not installed locally.
[IMPROVED] Improved Global Styles font handling in non-English operating systems.
[IMPROVED] Improved browser preview performance for pages containing large videos and files.
[IMPROVED] Faster image drawing on the design canvas.
[IMPROVED] Improved Retina image size handling.
[IMPROVED] Improved display of hidden objects on the design canvas.
[IMPROVED] Improved rendering of long text objects.
[IMPROVED] Optimized project saving performance.
[IMPROVED] Widgets in the Insert menu are now listed alphabetically.
[IMPROVED] Contact Forms now include basic spam filtering.
[IMPROVED] Required Contact Form fields now work correctly across multiple columns.
[IMPROVED] Additional web crawlers are now blocked automatically through .htaccess rules.
[IMPROVED] Improved error handling when EverWeb cannot write to the Application Support folder.
[IMPROVED] Additional interface text has been localized and translated.
[IMPROVED] Improved widget previews on Windows.

[FIX] Fixed a crash on Windows when using widgets containing Styled Text controls.
[FIX] Fixed a crash that could occur when using certain bold fonts.
[FIX] Fixed potential crashes involving FTC text fields.
[FIX] Fixed duplicate document windows appearing in the Window menu on macOS.
[FIX] Fixed publishing failures that could occur while writing final website files.
[FIX] Fixed membership pages not being protected when sign-out or profile buttons were not present.
[FIX] Fixed Responsive Rows not collecting all child objects in built applications.
[FIX] Fixed blog index and archive positioning issues on fixed-width pages with footers.
[FIX] Fixed blog pagination issues.
[FIX] Fixed Blog Archive and Blog Posts margin settings not being respected.
[FIX] Fixed Blog Archive spacing settings not being respected.
[FIX] Fixed opacity rendering issues with line shapes.
[FIX] Fixed rotated objects on Master Pages publishing at incorrect positions.
[FIX] Fixed container drawing issues on fixed-width pages.
[FIX] Fixed containers with borders drawing incorrectly when no fill color was applied.
[FIX] Fixed rotated objects inside Container Rows publishing at incorrect positions.
[FIX] Fixed vertical text movement issues inside Containers.
[FIX] Fixed pinned lines drawing incorrectly when resizing the canvas.
[FIX] Fixed pinned offset calculations conflicting with shape backgrounds.
[FIX] Fixed Containers changing position when using Bring to Front or Send to Back.
[FIX] Fixed object labels not refreshing correctly after selection changes.
[FIX] Fixed the right-click menu not always showing Container child objects correctly.
[FIX] Fixed the Inspector changing tabs unexpectedly when renaming pages.
[FIX] Fixed Inspector updates when changing settings from canvas cog menus.
[FIX] Fixed website renaming issues in the Projects window.
[FIX] Fixed nested directory renaming not saving correctly.
[FIX] Fixed cmd-click asset duplication renaming the original asset.
[FIX] Fixed asset selection labels sometimes displaying incorrect information.
[FIX] Fixed full-width objects overflowing outside Container Rows.
[FIX] Fixed full-width Containers with image fills overflowing horizontally.
[FIX] Fixed Scale to Fill objects not centering correctly inside Containers.
[FIX] Fixed free-flow Container layout issues when containers changed height.
[FIX] Fixed drag-and-drop indicators occasionally remaining visible after a drag operation.
[FIX] Fixed issues when pasting objects into projects containing non-Latin characters.
[FIX] Fixed Text Section widget form field padding issues.
[FIX] Removed default 250-character alt text from the FlexBox widget.
[FIX] Improved YouTube video handling in the FlexBox widget.
[FIX] Fixed duplicate image support in Image Gallery widgets.
[FIX] Fixed Responsive Image Galleries occasionally losing their height.
[FIX] Fixed animation settings causing scroll position issues.
[FIX] Fixed preview page reloads reverting unsaved text changes.
[FIX] Fixed the QR scanner and added a copyable URL field.
[FIX] Removed the unused country list from PayPal Modern.
[FIX] Fixed Container move indicators alignment issues while scrolling.

How To Update EverWeb for Windows

You can easily update EverWeb for Windows by either:

  1. Launching EverWeb then opening a project file. From the Help menu at the top of the screen select ‘Check for Update’ or by
  2. Downloading EverWeb from the EverWeb website.

After downloading EverWeb, double click on the EverWebSetup.exe file. Note that the file name may have the version number appended to it and that you may need to initially trust the file to be able to download it.

Follow the instructions in the Installation Wizard until the installation is finished. You can delete the EverWebSetup.exe file afterwards by dragging it to the Recycle Bin.

How To Update EverWeb for macOS

You can easily update EverWeb for macOS by either:

  1. Launching EverWeb then going to the EverWeb menu at the top of the screen and selecting ‘Check for Update’ or by
  2. Downloading EverWeb from the EverWeb website.

After downloading EverWeb, double click on the EVERWEB.DMG file. A window will open. Drag the EverWeb icon on to the Applications folder icon.

Once the file has been copied, you can close the installation window, delete the .DMG file and eject the EverWeb disk on the desktop by dragging it to the Trashcan.

About Your EverWeb Update

Remember, you won’t lose any previous data when updating as your website project files are stored elsewhere on your computer.

The update is free for EverWeb + Hosting users and EverWeb Standalone users who are within their 1 year of free upgrades and support period.

You can easily check your EverWeb update period from your EverWeb-> Preferences… window on macOS, from your Edit-> Options menu on Window,s or from your client area.

If you have passed your one year of free EverWeb updates, you can purchase 1 more year of upgrades and support from your Client Area.

You can easily re-download earlier versions of EverWeb from your client area if you are not ready to purchase an additional year of updates and support.

Login to your Client Area and go to the ‘Manage Product’ page. On the left of this page, select ‘Downloads’ and choose the version of EverWeb that you need.

More Information About EverWeb

For more information about the new version of EverWeb, please check out the following resources:

  • The EverWeb website which has up to the moment information in its blogging section.
  • New EverWeb videos on YouTube.
  • The EverWeb User Manual in EverWeb’s Help-> User Manual menu.
  • The EverWeb Discussion Forum.

If you can’t find what you need, or have any other questions, comments or feedback please let us know.

EverWeb on Social Media

You can also find EverWeb on the following social media platforms:

Facebook

Flipboard

YouTube

X

Instagram

How to Create a Custom 404 Page in EverWeb

June 25th, 2026
Creating a custom 404 Page Not Found page in EverWeb

Nobody plans for their site’s visitors to hit a dead end, but it can and does happen. A link to a page goes stale, a page gets renamed, or someone simply mistypes a URL when looking for a particular page. With a custom made 404 page in your EverWeb project, your visitors will no longer get a generic browser error has no navigation, no brand, or no way back into your site. Stop your visitors leaving your site when they don’t need to with a custom 404 Page Not Found page.

EverWeb makes it easy to create a custom 404 page that keeps visitors inside your website, points them somewhere useful, and turns an awkward moment into a positive brand impression. Simply design the 404 page you want yourself, just like any other page in your EverWeb project, then assign it in either EverWeb’s Site Publishing Settings, or if you use your own hosting provide, in cPanel.

In this post, we will look at what causes the 404 Page Not Found error in the first place, then we will look at how you can design your own 404 page.

What Causes a 404 Error?

The three most common causes of a 404 Page Not Found page appearing are:

  • An outdated link on your website pointing to a page that no longer exists
  • A renamed or deleted page after a site update
  • A mistyped URL entered directly into the browser by a visitor

All three are common, and all three are things you can’t fully prevent. What you can control is what your visitor sees when it happens.

Step 1: Design Your 404 Page in EverWeb

Start your 404 page by adding a new page to your EverWeb project. You can use a theme template page if you want. The important point to remember though is that the finished page should feel like part of your site, not an afterthought.

What to put on your 404 page

A good 404 page does three things: it acknowledges the problem, reassures the visitor, and gives them somewhere to go. At minimum, include:

  • A clear, friendly message — something like “Oops, we can’t find that page” works better than the cold technical phrase “404 Not Found”
  • A link back to your home page — this is the single most important element to include
  • Navigation links — include your site’s navigation to the page so visitors can find what they were actually looking for
  • A search box (optional) — useful for larger sites with lots of content
  • Your branding — logo, colours, and fonts should all match the rest of your site

Keep the tone light if it suits your brand. A little humour or personality can go a long way on an error page. What you want to avoid is leaving your visitor with no options and no clue what to do next.

Responsive vs. Fixed Width Page Layouts

How many 404 pages you need to create depends on the page layout type you’re using:

  • Responsive Page Layout: You only need one 404 page. Because a responsive page automatically scales to fit any screen size, a single page handles desktop, tablet, and mobile visitors alike.
  • Fixed Width Page Layout (e.g. Centered Layout): You’ll need to create two separate pages — one designed for desktop and one for mobile. See the section below on linking them together.

Step 2: Assign Your 404 Page in Publishing Settings

Once your 404 page is designed, you need to tell EverWeb (or your hosting provider) to serve it whenever a visitor hits a missing page. How you do this depends on where your site is hosted.

EverWeb+Hosting Users

This is the simplest path. EverWeb handles the 404 redirect for you directly from within the app, there’s not need to go anywhere else.

  1. Go to File ? Edit Publishing Settings (or click your website’s name in the Web Page List)
  2. In the Site Publishing Settings screen, locate the 404 Not Found Page option
  3. Use the dropdown menu to select the 404 page you created from your list of project pages
  4. Publish your site

That’s it. EverWeb will automatically serve your custom page whenever a visitor hits a URL that doesn’t exist on your site.

EverWeb + Third-Party Hosting Provider Users

If you use your own Host Provider to publish your EverWeb made site, the process has one extra step. As EverWeb does not control your server’s error handling, you’ll need to point to your 404 page manually through your hosting provider’s control panel (typically cPanel).

  1. First, publish your site through EverWeb as normal, including your 404 page. Once published, your 404 page will have its own live URL.
  2. Log in to cPanel (or your hosting provider’s control panel)
  3. Find the Error Pages section and select the 404 error type
  4. Enter the full URL of your published 404 page
  5. Save your settings

Your hosting provider will now redirect all 404 errors on your domain to the page you designed in EverWeb. Check with your Hosting Provider for more information if needed.

Step 3 Fixed Width Websites Only: Linking Your Desktop and Mobile 404 Pages

If you are using a fixed width page layout, you will have created separate desktop and mobile versions of your 404 page. After creating these pages, you need to link them together so that EverWeb knows to show the right one on the right device.

  1. In the Web Page List, select your desktop 404 page
  2. Open the Page Settings tab in the Inspector window
  3. Scroll down to the Mobile Settings section
  4. In the Mobile Page dropdown, select One of My Pages
  5. In the Page dropdown that appears, select your mobile 404 page

Once linked, EverWeb will automatically serve the desktop version to desktop visitors and the mobile version to visitors on a phone — no extra work required after publishing.

So What Makes a Great 404 Page?

You can make a basic 404 Page that will get the job done, but with a little extra thought you can make your 404 page genuinely useful. Here are some tips…

Use Your Brand: Use the same header, footer, colors, and fonts as the rest of your site. A jarring, un-styled error page feels like a bug. A well-designed one feels intentional.

Add The Human Touch: Generic error language (“The requested URL was not found on this server”) is cold and confusing for non-technical visitors. Write like a person: “Sorry, we can’t find that page — it may have moved or been removed.”

Present a Clear Next Step: A button back to your homepage should be prominent. If your site has a search feature, include it. The goal is to keep the visitor engaged, not send them back to Google.

Keep It Simple: A 404 page isn’t a Home or landing page. Keep it simple, focused, and fast to scan. One strong call to action is better than five competing ones.

Why This Matters for SEO

A custom 404 page doesn’t directly improve your search rankings, but it does prevent something that can quietly hurt them: visitor bounce. When someone hits a dead-end error page and immediately leaves your site, that’s a negative signal. A well-designed 404 page that redirects visitors back into your content can meaningfully reduce that drop-off.

It’s also worth auditing your site periodically for broken internal links — the most common cause of 404s you can actually fix. Tools like Broken Link Checker (a free web-based tool) can crawl your site and surface any internal links pointing to pages that no longer exist.

Summary

Creating a custom 404 page in EverWeb is a quick win that makes your site feel more polished and keeps visitors from hitting a dead end. Remember:

  1. Design your 404 page in EverWeb like any other page
  2. Assign it — via the dropdown in Site Publishing Settings (EverWeb+Hosting Users) or via cPanel (Third-party Hosting Providers)
  3. Link desktop and mobile versions of your 404 page if you’re using a fixed width (Centered) layout

If you haven’t set up a custom 404 page yet, it’s one of those small things that only takes twenty minutes and makes a real difference to your visitors’ experience.

EverWeb on Social Media

You can also find EverWeb on the following social media platforms:

Facebook

Flipboard

YouTube

X

Instagram

Moving and Embedding Objects In EverWeb

June 11th, 2026
EverWeb's Embed In Option

When developing your website, you will be adding and moving objects around the page so that all your text, images, and media are correctly placed and spaced. For fixed width page designs in EverWeb this is straightforward, you just drag and drop. If you are working with Responsive pages, you may find that you have to work in a more constrained way due to the nature of Responsive Web Design.

Moving Objects Around Responsive Pages

EverWeb helps you with object placement in responsive pages in a number of ways. In this post, we will be referring to the features found in EverWeb 4.4. If you are using an earlier version of EverWeb, some of the features described below may not be present, or may work in a different way than described below.

When you add a full-width object, for example a shape, to the page, you will see that its Object Label Toolbar includes up and down arrow icons so you can move the object up and down the page. You can also just drag and drop the shape up or down the page, no problem, and use the up/down icons only when you need to be sure of object placement, for example in a complex page design. 

If you are using a full-width widget, such as the FlexBox or Responsive Row widget, or a Container, you will also notice that there is a Move icon in the top right-hand corner of the object. In a Responsive page, this can be used to move the object up and down the page. So far, so good, but what happens when you want to move objects that have been placed within other objects?

Moving Objects Contained Within Other Objects

When you use a Container or the Responsive Row widget in a Responsive page layout, you will be using such objects for a reason – to place other objects inside them. When you do this, there may be times where you want to move one or more objects to a different location within the Container or Responsive Row. Easily done, just drag and drop the object to its new location. As you do so, you will see a vertical or horizontal dashed line appear between the object being moved and the objects that are not being moved. Again, this is to help make object placement easier visually.

Moving objects between Responsive Rows and/or Containers is also a drag and drop operation and again, you may see a dashed guideline to hope you with placement when you do this.

When using a Container Free Flow, you will see the Move icon again if you have other Containers within the Container Free Flow. In this case, you can move the inner Container in any direction around the Container Free Flow.

Embedding Objects

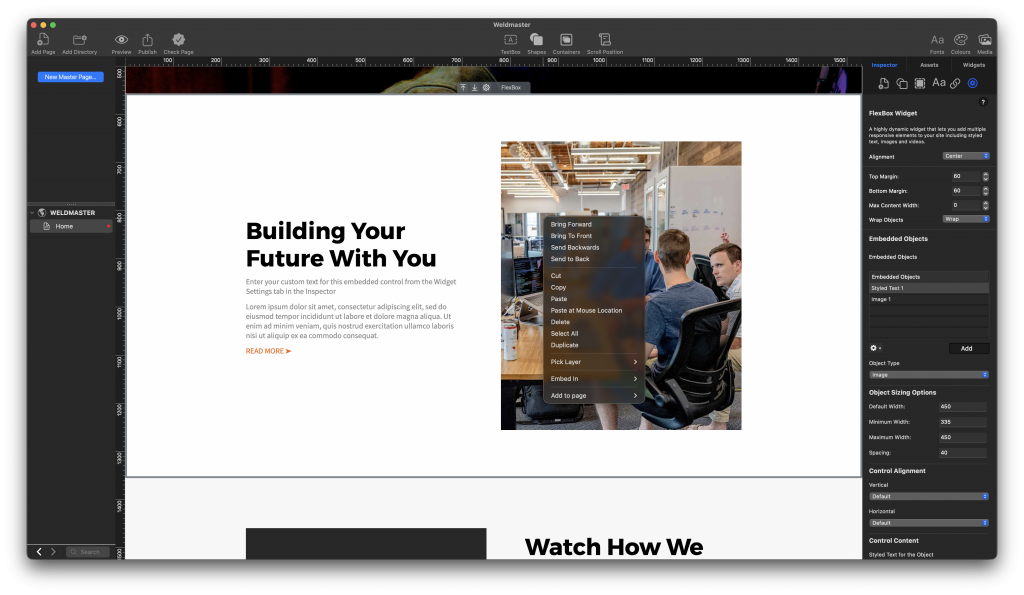
Drag and drop is usually the easiest way to move an object from A to B, but in some instances you may prefer a different approach. This may be the case when you have a complex page layout, or when you want to move an object from the top of the page to the bottom of the page. In such cases, you don’t want to accidentally drop the object in the wrong place, as this can disrupt your page layout. The simple option in this scenario is to use the Embed In option. All you need to do to use this feature is right-click, or secondary-click, on the object you want to move. You will see a menu of options. Scroll down to Embed In. Off of this menu, you will see a list of objects that you can embed the selected object into. Select the object you want to embed the selected object into.

Naming Objects

If you have a complicated page design, you may want to name some or all of the objects that you use on your page. This makes referencing them easier later on. In our example above, the list of objects to embed in to might have been, for example, ‘Container 1′, Container 2’, ‘Container 3’. If these objects had been named it would probably have made it easier to choose which object to embed the selected object into e.g. ‘Header Container’, ‘PayPal Container’, ‘Footer Container’.

In EverWeb 4.4 you can easily rename many object types using the Widget Settings in the Inspector Window or by clicking on the Settings Cog in the Object Label Toolbar of the object you want to rename. As of EverWeb 4.5, you will be able to just double click on the object’s name in the Object Label Toolbar to be able to rename it.

Removing Objects From a Container or Responsive Row

The easiest way to take an object out of another object is to drag it outside of the object then drop it to where you want. If, however, you want the object to be independent of any other object, then right click, or secondary-click on the object you want to remove. From the menu options, choose Remove from Container, or Remove from Responsive Row. In both cases, the object that is removed will become a full width object. You can then decide what you want to do with the object in question.

Remember Pick Layer!

If you have any difficulties selecting the object that you want to move, for example, you may have objects on top of each other, then right click on top of the object then use Pick Layer. This menu option will show you the list of objects that are stacked on top of each other so that you can select the correct one to move or manipulate.

Using EverWeb’s Embed In, Remove from and Pick Layer options make it easy for you to choose the object you want and move it to where you want it hassle free!

EverWeb on Social Media

You can also find EverWeb on the following social media platforms:

Facebook

Flipboard

YouTube

X

Instagram

Working With EverWeb In The Cloud

May 28th, 2026

Working in the Cloud is probably something that most EverWeb users will be doing sometime during their day. It’s inevitable, either at work or at home, the benefits of using the Cloud are undeniable. But it is a how does EverWeb work with the Cloud and what are the advantages and disadvantage of this type of strategy when it comes to building your website?

Read on to find out the answers to these types of questions!

EverWeb Software and The Cloud

Let’s start wth EverWeb software itself. The most important thing to remember is that EverWeb is standalone software. This means that you should not install it, or use it, in The Cloud. The software should be installed on your local Mac or Windows computer. only and accessed from there.

If you need to use EverWeb on two computers, for example a laptop and desktop, you can install the software on both machines. This is ideal if you are in situations when, for example, you are working both from home and office locations. Usually one person with EverWeb installed locally on two different computers is fine. There are caveats, though, about accessing project files from more than one computer which we will talk about later on in this post.

If you are in a situation where you have more than one person using EverWeb, then you will need to use a multi-person license, or the other people accessing EverWeb will need to have their own license. In this situation, we recommend contacting EverWeb Support to discuss your situation. The same applies if you work in Education and want to use EverWeb with students.

EverWeb’s Project Files and The Cloud

EverWeb’s project files provide the structure of your website as well as storing the media used in its pages. The project file is therefore a collection of files. On a Mac, all of the resources of your project are stored in a ‘.everweb’ file. In Windows, this collection of files is stored in a folder with the same ‘everweb’ extension instead.

When EverWeb creates a new project file it is stored with a randomly generated filename so that it remains unique. This is different to the name that you see on the Projects Window or the name that you assign your project in EverWeb itself. Think of these as aliases for the real file name. To see the ‘real’ file name, go to the Projects Window and click on the Ellipses in a Circle icon to the right of the project if you are using a Mac version of EverWeb. If you are an EverWeb for Windows user, click on the downward facing triangle. In both cases, a dropdown menu will appear. Choose the ‘Show On Disk’ menu option. This will reveal the real file name of your project and also its location on your local hard drive.

You can rename the real file name if you want. Sometimes this is a good idea, especially if you are using project files in The Cloud.

Using Project Files In The Cloud

Once you know the location of your project files on your hard disk, you might then want to move them in to the Cloud. There are a number of reasons why this might be a good idea:

  • it provides an instant backup source for the project
  • It provides a quick and easy way to recover project files if needed
  • You can easily store project file assets in The Cloud at relatively low cost
  • Facilitates collaboration (Note the restrictions below)
  • It enables you to easily work on one project file on more than one computer

If you move your project file in to The Cloud, bear in mind the following:

  • Potential Synching Issues: Whilst Cloud services are good, often you might get synching issues between computers accessing the same project file in The Cloud. If you are swapping work environment, we strongly recommend the following. First save and close your project on the computer you are currently using. Note the project file’s timestamp in the Cloud before moving the your new work environment. Once you have moved to the second computer, check your project file’s timestamp to make sure it matches that from the original computer. If it does not, then wait for the Cloud synching to take place, or trigger the synching manually if possible. Once the timestamps, are in synch, access the project file from the second computer.
  • Launching EverWeb: Sometimes EverWeb may take time to launch files in the Cloud are being synched. If EverWeb delays in launching, check to see if Cloud synching is taking place as this is often the cause of delay.
  • The Projects Window: If you store your project files in The Cloud, they will not be displayed anymore in the Projects Window. You will need to either use the File-> Open command (Mac and Windows), or double click on the project name in the Cloud on a Mac, or double click on the ‘EverWeb Project File.ewwinproj’ file in EverWeb for Windows, to launch EverWeb and the project file.
  • Single Use Access: When using EverWeb in The Cloud, only ONE person at ONE time should accesss the project file. EverWeb does NOT support shared access to project files, live co-authoring or shared editing. If more than one person is accessing the project file at the same time, one user will overwrite any changes the other user may make.
  • Internet Dependence: It goes without saying that if you do not have Internet access, you will not be able to access you project files in The Cloud. Coupled with this, if you do have Internet access but poor connection or connection speed, then you may find working with the project file is impaired.

Last Word…

Working with EverWeb project files in The Cloud can be very beneficial to your workflow and also provides a useful addition way to keep your project file backed up safely. Although there are caveats to using project files in The Cloud, once you are used to the way in which to work within these constraints, you will find that working this way straightforward and trouble free.

EverWeb on Social Media

You can also find EverWeb on the following social media platforms:

Facebook

Flipboard

YouTube

X

Instagram

EverWeb 4.5 Public Beta for Mac and Windows Now Available!

May 11th, 2026

We’re excited to announce the availability of the first public beta of EverWeb 4.5 for macOS and Windows! The upcoming EverWeb 4.5 release is going to be another huge release, expanding the Containers feature’s capabilities that we introduced in EverWeb 4.4. We also have a host of other exciting new features in this release: New Overlay Effects, Background Masks, Popup Windows, On-Click Actions, Target Focusing for Images, Pin Settings, new workflows and the all new Carousel widget are just some of the other major highlights coming soon!

Before Downloading The EverWeb 4.5 Public Beta…

Remember that Beta software is just that – “Beta“. This means that it is possible that there are still bugs to be ironed out of the software, or that some features and functionality may not work as expected at this time. Although we have tested the software extensively before releasing the public beta, there is still scope for project file corruption and crashes to occur.

If you want to try out the new EverWeb 4.5 features before its official release, we advise the following:

  1. Do not use the beta test software on live project files. Only use beta software on test project files.
  2. If you open existing project files in EverWeb 4.5 (beta), you may not be able to open these project files in older versions of EverWeb any more.
  3. If you install the Public Beta of EverWeb, it will overwrite your existing EverWeb version. We advise you to rename your currently installed version of EverWeb before installing the Public Beta version. You will then have the current official EverWeb release available as well as the beta version.
  4. If you need to re-download the current, official EverWeb version that is available to you, go to the Support-> Downloads area of your EverWeb Client Area to redownload it.
  5. When installing EverWeb software, your Project files will not be overwritten as they are stored elsewhere on your computer.
  6. Make sure you back up your EverWeb project files. You can do this within EverWeb itself which we recommend in addition to backing up your project files as part of your regular computer back up.
  7. When running EverWeb Beta software, a backup will be made automatically the first time you open the project file in the new beta version.

Installing the EverWeb 4.5 Public Beta

Once you have downloaded the version of EverWeb that you want to install, you will either have an everweb45b.dmg file (macOS) or an everwebsetup45b.exe file (Microsoft Windows) in your file download location.

Before installing the beta software, check the Before You Download… section of this post again. Once you have done that, just click on the .dmg file, or double click on the .exe file to kick off the installation process. Follow the prompts to complete the installation of the software.

Testing and Feedback

One of the most important things about issuing a public beta of EverWeb is your feedback. If EverWeb crashes, please submit the crash report so we can fix it.

If you find issues when using EverWeb, please use the EverWeb Forum to document the issue. We will report back to you as soon as possible. Sometimes, recording the issue for us can help.

Don’t forget to check the EverWeb Forum regularly for updates. New public betas may be released based on testing and feedback. All updates will appear in the Public Beta Announcement Post.

You can also check the forum for the status of any issue you have previously reported.

The Official EverWeb 4.5 Software Release

We are often asked the question about when will the next version of EverWeb be available. We are keen to get a new version of EverWeb out with its exciting new features, but will only do so once we are satisfied that the new version is ready for release and has been tested thoroughly, both internally and via the Public beta Test program. Thank you for your patience during the time between the beta and full release version!

EverWeb on Social Media

You can also find EverWeb on the following social media platforms:

Facebook

Flipboard

YouTube

X

Instagram

Publishing Your EverWeb Website For The First Time!

May 7th, 2026

When you start to build your website in EverWeb there will inevitably be a time when you will decide that now if the time to publish your site to see it in action.

Selecting Only What You Want To Publish…

When developing your site in EverWeb, there may be pages that you have developed that you do not want to publish at the moment. There may also be pages that you never want to publish. These could be pages in your Project that you use for reference purposes. For example, you may have a page of notes that include the site author’s details, the purpose or goal of the site, the date the site was created, notes about ideas and themes you want to follow up later, a list of changes you want to make in the future and so on.

In these instances you do not want these types of page published. To stop EverWeb publishing a page, simply right click on the page you do not want to publish in the Web Page List. Choose the ‘Do not publish’ option. When you select this option, the page name and page icon next will turn grey in color. and will not publish when you come to publish your site. To change the status so that the page does publish, simply repeat the above steps.

Alternatively, you can also stop a page from being published by using the Page Settings tab in the Inspector Window. Here, select the Advanced Options section and check the box ‘Do not publish’.

When To Publish Your Site

You might want to publish your site whilst you are still developing it, to test out features that you have added or are in development. You will also want to publish your site when you have completed it and want to test it out before publicly launching it. Lastly, you will want to publish when you have completed and fully tested your site to the Internet for the world to see and use!

Publishing Safely During Site Testing

As mentioned above, we recommend testing your site before you publish it, to get any wrinkles out of it before you publish it for the whole Internet to enjoy. Testing will include things such as making sure that your pages work on different browsers, on different device sizes and checking that all links go to where they should go to. Often you can use Preview for testing, but there may be some features, such as the PayPal Modern or FaceBook Page Timeline widgets, that require ‘live’ connections to function properly for testing purposes. In these cases, publishing your site may be required for testing purposes.

When testing your site, we recommend that you use a test directory to do so. This will give you a safe environment away from public scrutiny to work out any problems or issues before going ‘live’ with your site. You can easily set up a test directory to use for this purpose. Click on the name of your website in the Web Page List or use the File-> Edit Publishing Settings menu option. In the subdirectory field you can enter a test directory name, for example, ‘Test’. You can then publish to this subdirectory and use it for testing purposes. When you are ready to publish the final, polished version of your site remove the ‘Test’ subdirectory name so that your site publishes to the main domain name instead.

Publish The Whole Site or Just Changes?

When publishing your website, there are two options available. You can publish either the whole site, or just the changes you have made to it since its last publish. Obviously, when you publish your site the first time, you will be publishing the contents of the whole site. The easiest way to publish your site is to click on the Publish button in the Toolbar. Note that this option will only publish the changes you have made since the last publish. This is usually the best option as it will save you time, and it is not usually necessary to publish the whole site every time you publish. If you make changes to one page that affect other pages e.g. you change a Master Page, EverWeb will flag these associated pages as needing to be republished. You will see the Page icons in the Web Page List change to Red when this type of scenario happens.

You can also use the File-> Publish Site Changes menu option instead of the Publish button if you prefer. There may also be rimes when you want to publish the whole site. This may happen if you find that some of the links in your site are not working properly even when you have checked them. Publishing the whole site can sometimes be a useful remedy if you encounter problems after you have published changes to your site.

How To Publish Your Site

We have already mentioned above the ways in which you can publish your site, but there is also another important requirement to publishing and that is where you should publish your site. This bring us to where you site is hosted. You will either publish your site using EverWeb’s Hosting service, or you can choose your own Hosting provider if you want. The advantage of using EverWeb+Hosting is that you can access many hosting features directly in EverWeb itself instead of having to go ‘behind the scenes’ to use tools such as cPanel. It is also simpler to set up the administration side to your site as well using this route.

If you have chosen to host with EverWeb, go to the Site Publishing Settings screen in your project to set up your publishing location. Either click on the name of your project in the Web Page List, or use the File-> Edit Publishing Settings menu option. Set the ‘Publish To’ location to ‘EverWeb’. If you are using your own Hosting provider, no problem, just change the ‘Publish To’ location to FTP Server. In either case complete the details required. For EverWeb+Hosting users, these are probably completed already. If you are using your own Hosting service, contact them for the details required if you do not have them already.

Once you have completed all of these details you are ready to publish your site!

Post Publishing Status

Once you have published your site, you will see that all of the pages in the Web Page list that were flagged red are displayed in black again, or white if you are using dark mode. This indicates that all of the pages that have been changed since the last publish have now been published. Job Done!

Now you can go to your published site, or test site, to check to make sure that everything works as expected!

EverWeb on Social Media

You can also find EverWeb on the following social media platforms:

Facebook

Flipboard

YouTube

X

Instagram

Getting To Know EverWeb’s Directories

April 24th, 2026

One of the most useful features of EverWeb is an incredibly simple one: Directories. They have always been a feature of EverWeb and have many different uses. In this post, we will ta taking a look at how to use directories, and what they can be used for…

What is a Directory?

A directory is essentially a container that can hold pages and directories within it. A directory is sometimes referred to as a folder and rightly so as it functions to collect together similar or related items in one location.

Adding Directories

Adding a directory to your site is easy. Just click on the Directory button in the Toolbar. Alternatively, use the File-> New Directory menu option, or use the shortcut keyboard command Command+Option+N on a Mac, or Control+Alt+N in Windows.

EverWeb has one other way in which to add a directory and that is by converting an existing page in to a directory. You may find that when you are designing a page that you actually want it to be a directory rather than a page. To convert a page, first right, or secondary click on the page you want in the Web Page List. Next, choose ‘Convert to Directory’ from the list of menu options. The Page icon will change to the Directory icon when you take this action. Note that converting a page to a directory is a one way process. You cannot change a directory in to a page. If you have converted a page by mistake, you can undo the action if you do this immediately. In all other instances, you should create a new page, then copy the contents of the directory page in to it.

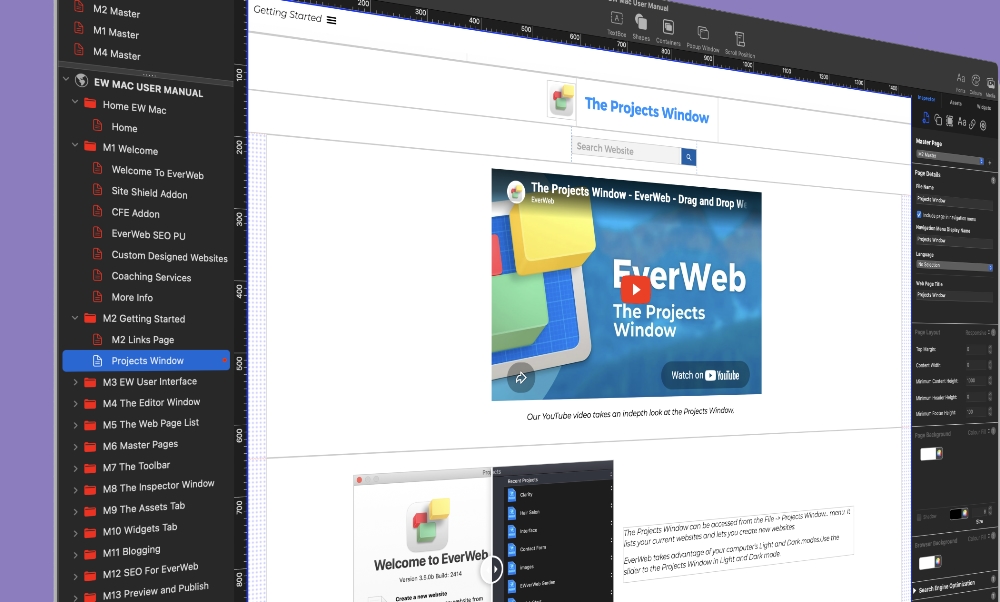
Once you have added a directory, you will see it listed in the Web Page List which is the left hand column of the EverWeb User Interface. The directory will be displayed with a folder icon. When you add the directory, this folder will be red in color, indicating that it has not been published yet. When you do publish your site, the folder color will change to a grey color indicating that it has been published. If you then edit the folder, or its contents, the folder icon will again change to red indicating that it has been edited since the last publish.

The final color that you may see the folder as it a dark grey color indicating that the folder has been set to ‘Do not publish’.

When you add a directory to the Web Page List, a triangle to the left of the directory name is added. This is an expand/collapse directory toggle. If you have a large website, you will often find it easier to keep most directories collapsed so that you can focus on only those directories that you are working on at the time. So, if you want to expand a directory, just click on the triangle icon. It will change to a down facing triangle when you do so.

Directories and Site Organization

One of the most useful things about Directories is that they let you organize your site and the pages within it. You can add pages to a directory, or remove them, just by drag and dropping them into, or out of, the directory. As you do so, you will see a guideline appear to help you correctly place the page in to, or out of, the directory. In addition to pages, you can put directories within directories.

You can also move directories themselves within the Web Page List by drag and dropping them where you want. In the upcoming Everweb 4.5 release, the Web Page List state will be remembered which means that the next time you open the project file, the Web Page List will be displayed as it was when you last left it.

Deleting a directory is also as you would expect, just click on the directory you want to remove and press the backspace key on your keyboard. You will be asked to confirm the deletion, unless you have specifically disabled this default.

Directories and the Navigation Menus

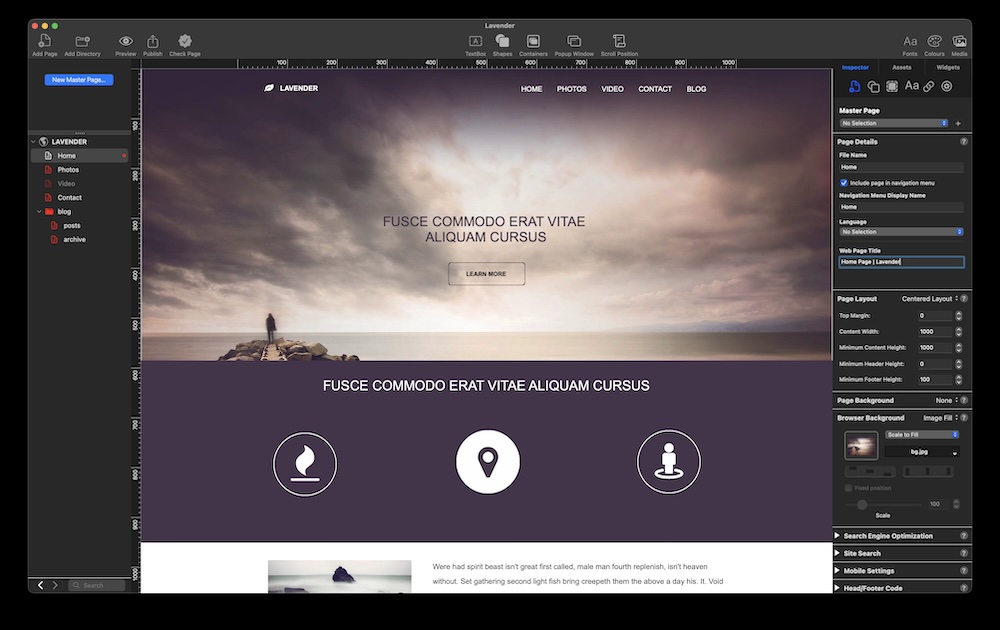
One of the main areas where directories have an impact is with EverWeb’s Navigation Bar widget. The widget takes the directory structure and translates it in to the navigation. The page and directory structure from top to bottom, translates to the menu bar display from left to right. if you want to exclude any pages or directories from the menu bar, uncheck the ‘Include page in navigation menu’ option in the Page Settings tab of the Inspector Window.

When you use directories, the pages hanging off of the directory will become dropdown menu items. Note that EverWeb’s Navigation Bar widget only allows you one level of dropdown menu. Check out third party widget offerings if you require more than one level of dropdown. Usually one level dropdown is enough ensure easy navigation for your visitors.

When using dropdown menus, you may not want your visitor to access the Directory page itself. This is usually when the Directory page is used as just a heading for the pages within to hang off. In this case, click on the directory page in the Web Page List, then check the box ‘Redirect to first child page’ in the Page Details section of the Page Settings tab in the Inspector Window. When you preview or publish your site, if a visitor clicks on the Directory page, the page that opens will be the first page in the dropdown menu list.

Directories and SEO

When using pages or directories in EverWeb, you should also consider their file names. This is especially important if SEO (Search Engine Optimization) in EverWeb is important to you. You can rename the directory (or page) either by double clicking on the name in the Web Page List, or by using the Filename Option in the Page Settings tab of the Inspector Window. The filename also provides hyperlink names for the Navigation Bar widget so making the name SEO friendly is useful. Whilst it is good to key your file name to be SEO friendly, do not forget that readability should always take preference over SEO. For the Navigation Bar widget, you can use the Navigation Menu Display Name field to present your visitors with easy to read navigation menu items.

EverWeb’s directories are incredibly useful and versatile, whilst being simple to use at the same time!

EverWeb on Social Media

You can also find EverWeb on the following social media platforms:

Facebook

Flipboard

YouTube

X

Instagram

EverWeb’s Tale of Two Scroll Positions

April 12th, 2026
EverWeb's Scroll Position

If you have ever wanted to hyperlink a button, or a piece of text, in your site to a specific point on a page, EverWeb‘s Scroll Position is the feature that you will need to use. Hyperlinking in this way is like a ship dropping an anchor. The ship is always anchored to the anchoring point. The same is true when you use Scroll Position. You use one object on a page as the anchoring point to which other objects, such as a button or piece of text, are tethered to.

Introduced back in EverWeb 2.6, this was a time when EverWeb only supported Fixed Width page layouts. When Responsive Page Layouts were introduced to EverWeb in version 2.8, there was a need to introduce a new form of Scroll Position. This came when Set Shape as Scroll Position was added to EverWeb in EverWeb 3.2 in April 2020.

A Tale of Two Scroll Positions

So you may be wondering, why do we need two different types of Scroll Position? Essentially, we only really need one type of Scroll Position, that being Set Shape As Scroll Position. The reason being that this type of Scroll Position can be used on all page layout types, both Fixed Width and Responsive.

The other Scroll Position type, Insert Fixed Scroll Position, can only be used on a Fixed Width Page Layout but remains so that you if you are created a Fixed Width website using Scroll Position before EverWeb 3.2 then you are are still supported.

Essentially Insert Fixed Scroll Position remains for legacy purposes. It is also visually very distinctive is uses a horizontal line to easily show you where the Scroll Position is located on the page. For those using the Centered Layout page layout type it’s very easy to use.

With all this EverWeb history in mind, let’s look at the two Scroll Position versions in more detail…

Scroll Position For Fixed Width Pages

As mentioned above, EverWeb introduced Scroll Position with EverWeb version 2.6 back in December 2017. At this tine EverWeb was designed for use only with Fixed Width pages in mind, i.e. the Centered layout and Left Aligned layouts. For long time EverWeb users, there was a third page type that existed at the time called Dynamic. In reality the Left Aligned and Dynamic page layout types were not used, so the Centered Layout type was the one we all used.

The addition of the Scroll Position feature also meant that the feature was also added to EverWeb’s Toolbar. It still remains there to this day, but also can be accessed using the Insert-> Insert Fixed Scroll Position menu option.

When you add this type of Scroll Position, it will be added to the page as a blue line across the page. You can drag and drop the line to where you want it placed. Each Scroll Position that you add also has a unique name on the page that it is on. You can easily change the name, just select the Scroll Position then change the name by clicking on the Widget Settings tab in the Inspector Window then editing the Unique Name field. By default, the name given to the Scroll Position is the pixel point on the page that the Scroll Position is initially located at.

To use the Scroll Position, select the text in your button, or piece of text you want to use, then go to the Hyperlinks Inspector. Check the box ‘Enable as Hyperlink’. The Link To field should be set as ‘One of My Pages’. The Page field should either be set to ‘Current’, or the name of the page the Scroll Position is located on. This means that you can link to positions on other pages in your site. Once you have completed these steps, test your page using the Preview button in the Toolbar.

If you want to delete the Scroll Position, simply highlight it, then press the Backspace key.

Scroll Position For Responsive and Fixed Width Pages

Set Shape as Scroll Position debuted in EverWeb 3.2 and as its name implies, you add your Scroll Position to an object on the page. To use this feature, select the object that you want to scroll to. This could be, for example, a shape, TextBox or even a widget such as the FlexBox widget. Remember that you can use this type of Scroll Position on either a Fixed Width or Responsive Page. After selecting the object that you want to use, go to the Scroll Position button in the Toolbar. Select the ‘Set Shape as Scroll Position’ option. You will see that a blue anchor symbol added to the selected object. You will also be asked at the same time to name the Scroll Position with a name that is unique to the page.

You can then use the Scroll Position in the same way as outlined in the section above for Insert Fixed Scroll Position.

If you want to rename the Scroll Position, select the object that uses the Scroll Position. Next, go to the Shape Options tab and open the Scroll Position section if it is not already open. Edit, or enter a new name. If you want to delete the Scroll Position just leave the field completely empty.

Displaying Scroll Position

When using Scroll Position, you will either see a blue horizontal line if you used Insert Fixed Scroll Position, or a blue anchor symbol in the top right hand corner of the object if you used Set Shape as Scroll Position. The Insert Fixed Scroll Position visual indicator will always display. When using Set Shape as Scroll Position the anchor symbol will not display if you have set Window-> Show Layout to ‘Hide Layout’ in which case it will not be visible..

Which Scroll Position To Use?

Our recommendation is to use Set Shape as Scroll Position. The main reason for this is that even if you are currently working in a Fixed Width environment, you may at some stage migrate to a Responsive Page Layout, so you will be working consistently at all times just using one style of Scroll Position. No frustration or relearning needed!

EverWeb on Social Media

You can also find EverWeb on the following social media platforms:

Facebook

Flipboard

YouTube

X

Instagram

EverWeb Site Shield Addon Q&A 2026 Edition

March 26th, 2026

EverWeb Site Shield Addon launched back in July 2017 coinciding with the launch of EverWeb 2.3. Updates to Site Shield came in 2022 and also in 2024, which means that our original Q&A from 2018 is now a bit dated. So let’s fix that with an updated EverWeb Site Shield Addon Q&A 2026 Edition!

Q. What is EverWeb Site Shield Addon?

A. EverWeb Site Shield Addon enables end to end data encryption of your website data, right from your Hosting Server to your website visitor’s browser window.

Q. What version of EverWeb do I need to use Site Shield Addon?

A. We recommend always using the latest version of EverWeb wherever possible. At the time of this Q&A, EverWeb 2.9.1 is the minimum available EverWeb software and EverWeb 4.4.3 is the latest version. If you have a current EverWeb Support and Updates plan, use the EverWeb-> Check for Update… menu on macOS, or Help-> Check for Update… menu in Windows, to update your EverWeb to the latest version. 

If you do not have a current Support and Updates plan, you can purchase this through your EverWeb Client Area.

Q. I’m an EverWeb for Windows user. Is Site Shield available for Windows users as well as Mac users?

Yes, Site Shield Addon can be used on EverWeb for Windows and EverWeb for Mac.

Q. Is Site Shield Addon the same as an SSL Certificate?

Secure websites use HTTPS and this is enabled through an SSL Certificate. SSL stands for Secure Sockets Layer and it creates an encrypted connection that establishes trust in data transfer between web browser and web server. Site Shield Addon is EverWeb’s branding for the SSL Certificate including EverWeb’s exclusive easy HTTPS implementation from directly within the product at just the click of a button.

Q. Do I need an EverWeb+Hosting Account to be able to use Site Shield Addon?

A. You don’t need to have an EverWeb+Hosting account. Site Shield Addon works if you host with your own Hosting Provider or if have an EverWeb+Hosting account.

Q. If I am hosting with my own provider. What do I need to use EverWeb Site Shield Addon?

A. If you host with your own Hosting Provider, you will need to obtain a valid SSL Certificate from them before using Site Shield addon. There are no other requirements.

Q. How do I get Site Shield Addon?

A. If you have an EverWeb+Hosting 2GB account or an EverWeb Standalone account you can purchase Site Shield Addon through your EverWeb Client Area.

If you have a an EverWeb+Hosting 10GB, or higher, account, Site Shield Addon is absolutely free and can be activated through your EverWeb Client Area.

Q. How much does Site Shield Addon Cost?

A. If you have an EverWeb+Hosting 10GB or higher account, Site Shield Addon is absolutely free. For EverWeb+Hosting 2GB accounts, or if you have an EverWeb Standalone license, Site Shield Addon costs $39.95 USD* per year. In both instances there are no additional costs involved in upgrading your website from HTTP to secure HTTPS.

*Prices may be subject to change, so check our website for current pricing details.

Q. Why do I see a Grey/Black Padlock and not a Green Padlock when I have Upgraded to HTTPS?

A. When using HTTPS, you usually see a padlock displayed to the left of the website URL in the browser search bar. You may have noticed that the padlock on some websites is dark grey or black but on other other websites it is green. For all intents and purposes, there is no difference as both indicate that the website is secure. The difference in color indicates that encryption has been implemented technically in different ways.

Q. What happens if I have HTTP references in my website links in EverWeb? Do I need to change these?

A. It is not necessary to change these references, but it is better to do so as this will ensure data encryption.

Q. I checked the box ‘HTTPS Secure URLs’ and published my website, but don’t see the Padlock displayed.

A. If you do not see the padlock displayed in the browser search bar when viewing your website, check the URL in the search box of your browser. You should see that your URL starts with HTTPS. If not make sure that you publish your entire site using the File-> Publish Entire Site menu option.

If you still do not see the padlock, it  is possible that there is not a secure link to an image, widget, fonts or other object on the page. You may need to remove objects one by one to test to see which object is causing the problem. If you are tech savvy, you can use the ‘Inspect Element’ of Safari’s Developer menu to locate the problem (or your browser’s equivalent of this tool.) If you have inserted any code directly in to the page (using the HTML Snippet widget) or in the Page or Site Settings using the Header/Footer Code sections, this may also be the cause of the problem. Try removing any code you may have inserted and test again.

Q. If I have more than one website can I use Site Shield Addon for all of these as well?

Yes, if you have more than one website under your EverWeb website domain, you can use the HTTPS Secure URLs checkbox in Site Publishing Settings for all of your websites.

Monetizing Your Website with EverWeb’s Membership Sites Addon!

March 13th, 2026
Starting Your EverWeb Membership Site

Your EverWeb made website will probably combine one or more of the following functions: To inform, communicate, engage with and offer space for community, promote brand identity, and facilitate transactions. If the latter, transactions, if important, you might want to combine with the communication and engagement functions to maximize your site’s earning potential. EverWeb includes widgets such as the PayPal Modern and Stripe widgets, with many other ways to integrate other payment providers. B ut you might want to take the sale of your goods and services a step further by offereing a Membership Site.

Why a Membership Site?

Starting your own membership site can have a number of advantages for your business:

  1. Can provide you with recurring income
  2. Allows you to offer exclusive content to your members
  3. Facilitates better audience engagement
  4. Can give you better insights in to your audience
  5. You have control over who has access to your content

Whilst the advantages sound good, you should also consider these other factors before starting with your own Membership Site:

  1. Keeping Content Ongoing. Members will expect new content on a regular basis
  2. Membership Account Management needs to ba factored in, especially as your membership grows
  3. Keeping Your Members can also be a challenge due to their expectations and what can be delivered
  4. Higher Expectations especially from paying members who expect more exclusive content,

Adding EverWeb Membership Sites

After evaluating whether a Membership Site is right for your business, the next step is to get started. Using EverWeb’s Membership Sites add-on is the easy way to integrate a Membership Site in to your EverWeb site. The links are already in place in EverWeb itself.

You can purchase your EverWeb Membership Sites license from this link. Select Membership Sites from the menu options on the left of the page. Here you will find three different levels of Membership Site that you can choose from:

  • Membership Starter – Free Entry Level
  • Membership Plus – $10 USD / Month
  • Membership Deluxe – $50 USD / Month

If you find that the plan that you have selected is not the right one, you can change this at any time in the future. To do this, login to your EverWeb Client Area. Go to the Services menu option, then choose My Services. Click on the down arrow next to the Spanner icon to the right of your Membership Site product addon. Choose Manage Product. You can then change your Membership Sites plan as required. If you have any problems, EverWeb Support will be able to help.

Getting Your Membership Site Up and Running

After purchasing the plan that meets your needs, you will receive an email with a EverWeb Membership Sites Widgets collection that you will need to use when building your membership site. Instructions are provided on how to install the widgets.

Getting your Membership Site up and running will take some time and effort. There will be work to do at the front end in EverWeb. This will be where you will be building your membership site’s user interface using the widgets pack that you were emailed when you signed up.

For the front end of your membership site, the widgets will allow you to create a Membership Sign Up page, a Member Login page, an Email verification page, a Change Password page, a Membership Profile page, a Membership Payment page, and a button for quickly logging out of the Membership Site.

Using the widgets is just the start as you will also need to make pages for your content. The number of pages you will need for this depends on how much content per membership level you have. You will probably also want to create pages for circumstances where a member has cancelled their account, or where you have had to suspend their account. For more information on building the front end of your EverWeb Membership Site, check out post, Creating Your EverWeb Membership Site Front End.

There’s also the back end of your membership site to create. This is where you manage all of the administration tasks that are associated with your membership. As well as administering your member details and payment methods, you will also use the backend of Membership Sites to set up your membership levels, emailing options, set up and administer discounts and so on. For more information on how to create and manage your Membership Site’s Backend check out our post, Creating Your EverWeb Membership Site’s Backend.

Planning Your EverWeb Membership Site

The most important part of your Membership Site is planning as much of it as you can in advance. We have a complete section on EverWeb Membership Sites in our website to help get you started. We recommend that you follow the steps outlined so you can see what work is involved for your own site, what you may not have thought of (e.g. time and administration considerations), as well as making sure that you have content that adds value for each membership level, both now and in the future. Planning activities that tie in to your Membership Site, such as promotions, discounts, periodic sales (e.g. Black Friday), marketing activities etc., will all help you be as best prepared as possible before you begin.

Planning is also in advance is also helpful so that you can roll out your Membership Site in stages if necessary, and will be less overwhelming as you will not have to do everything all at once.

EverWeb on Social Media

You can also find EverWeb on the following social media platforms:

Facebook

Flipboard

YouTube

X

Instagram