
Image Masking in EverWeb
October 22nd, 2015EverWeb’s Mask tool is an easy way to hide part of an image without having to crop the image itself. Masking is great when you want to keep an image in tact. It’s also useful as you can reuse one image in a number of different ways so saving you time and effort. Here are some ideas on how you can get the most out of image masking…
First create a web page and style it as you wish. In the example below, we are using an online financial news service covering the Stock Market. The web page created has a newspaper style format. The web page illustrates that it’s been a good week on the Stock Market emphasising this by using the image of a bull to show a ‘bullish’ market.
Place the image you want to use on to the Editor Window by dragging and dropping it from it’s original source. Place and resize the image according to your own requirements.
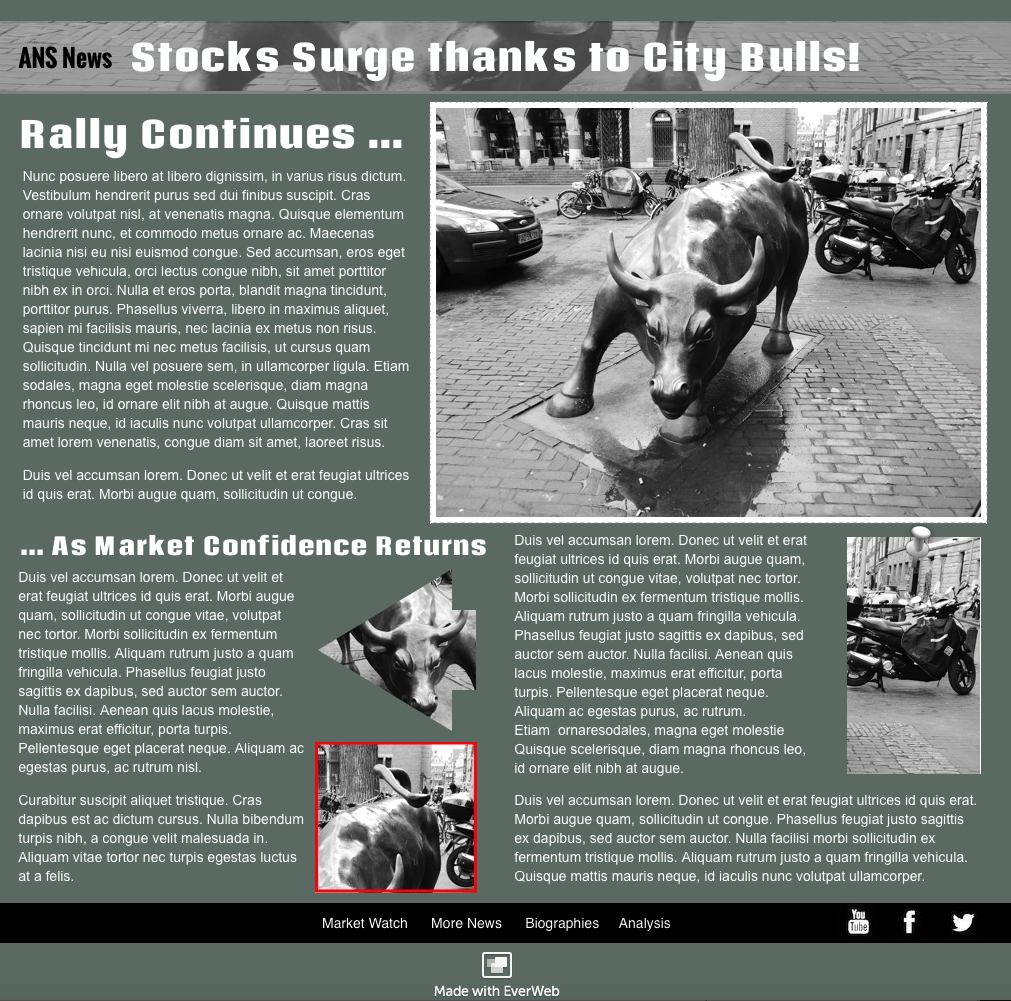
The example web page shows the original image in the top right. Masks of the original image appear with different effects behind behind the headline and in the second half of the page.
In our example, the complete image is shown in the top right of the page underneath the headline. We can now reuse the image in our news article. To do this, either select the image in the Editor Window and copy and paste it as many times as desired or drag and drop the image on to page as many times as you want from the Assets List.
These two methods use the same image file in the Assets List. Do not repeatedly drag and drop the image on to the Editor Window from it’s original source as all you will be doing is duplicating the file in the Assets List. It will also lead to slower page download speeds as well as you have to download multiple images and not just one image.
In our example, we want to isolate the bull in the picture and use just part of the image picture later on in the page. To do this, first select the image that you have copied. Next we will apply a mask.
Click on the ‘Mask’ button in the Toolbar at the bottom of the Editor Window. Alternatively, use Format-> Mask from the menu, or for speed, the shortcut key Shift+Cmd+M.
The Editor Window will now become somewhat opaque. This is the mask itself that covers the whole Editor Window. The square window at the centre of the image is the ‘unmasked’ area and is bordered with a dashed line. Notice that the image under the mask still has grab handles around it. This means that you can reposition the image underneath the unmasked square. Click, hold and drag the image to where you want it, just make sure that when you start this operation that you do not click inside the unmasked square itself.
To move the unmasked square over the top of the masked image, click and hold the centre of the square and drag and drop it to the desired location. When you do this operation the unmasked square will then show grab handles around it.
If the unmasked square does not have grab handles around it, click once in the square. You will now be able to resize the unmasked square to show more or less of the underlying image. Click and drag the grab handle(s) to resize the square as you would do with any other object.
When finished, click in an area outside of the whole image. The masking will disappear and you will only see the part of the image that you defined in the mask. It’s important to remember to click outside of the whole image boundary for this to work correctly.
To remove the mask, select the masked image. The Mask button in the Toolbar will now be named as ‘Unmask’. Select this and the whole image will become visible again.
Masked objects are like any other objects and so can be moved, deleted, copied etc. You can add effects to the masked image using the Shape Options and Metrics Inspector options. In our example we have applied some Picture Frames, changed the masked image shape style from a rectangle to an arrowhead and used the Full Width option to create the banner effect behind the headline.
Images can also be resized even when masked using the grab handles that appear when you select the image. As you do this, the mask will also change in size. This is useful if you find that your original masking was not ‘spot on’ and you need to do some slight readjustments without having to redo the complete mask.
In all other instances, if the masking is incorrect it’s best to unmask then apply the mask again. Additionally, avoid using ‘Undo’ and ‘Redo’ commands (e.g. if you resize the mask area then decide to undo the action) as this can have unexpected results. Finally, to mask successfully, do not move the masking square outside the boundaries of the original image as this may cause unexpected results.
The completed web page above includes four masked pictures and the original picture which should also save time on page download speeds. Masking is a excellent tool to use images in versatile ways whilst also adding design flair to your web pages.