
Organizing Page Assets In To Folders in EverWeb
August 18th, 2022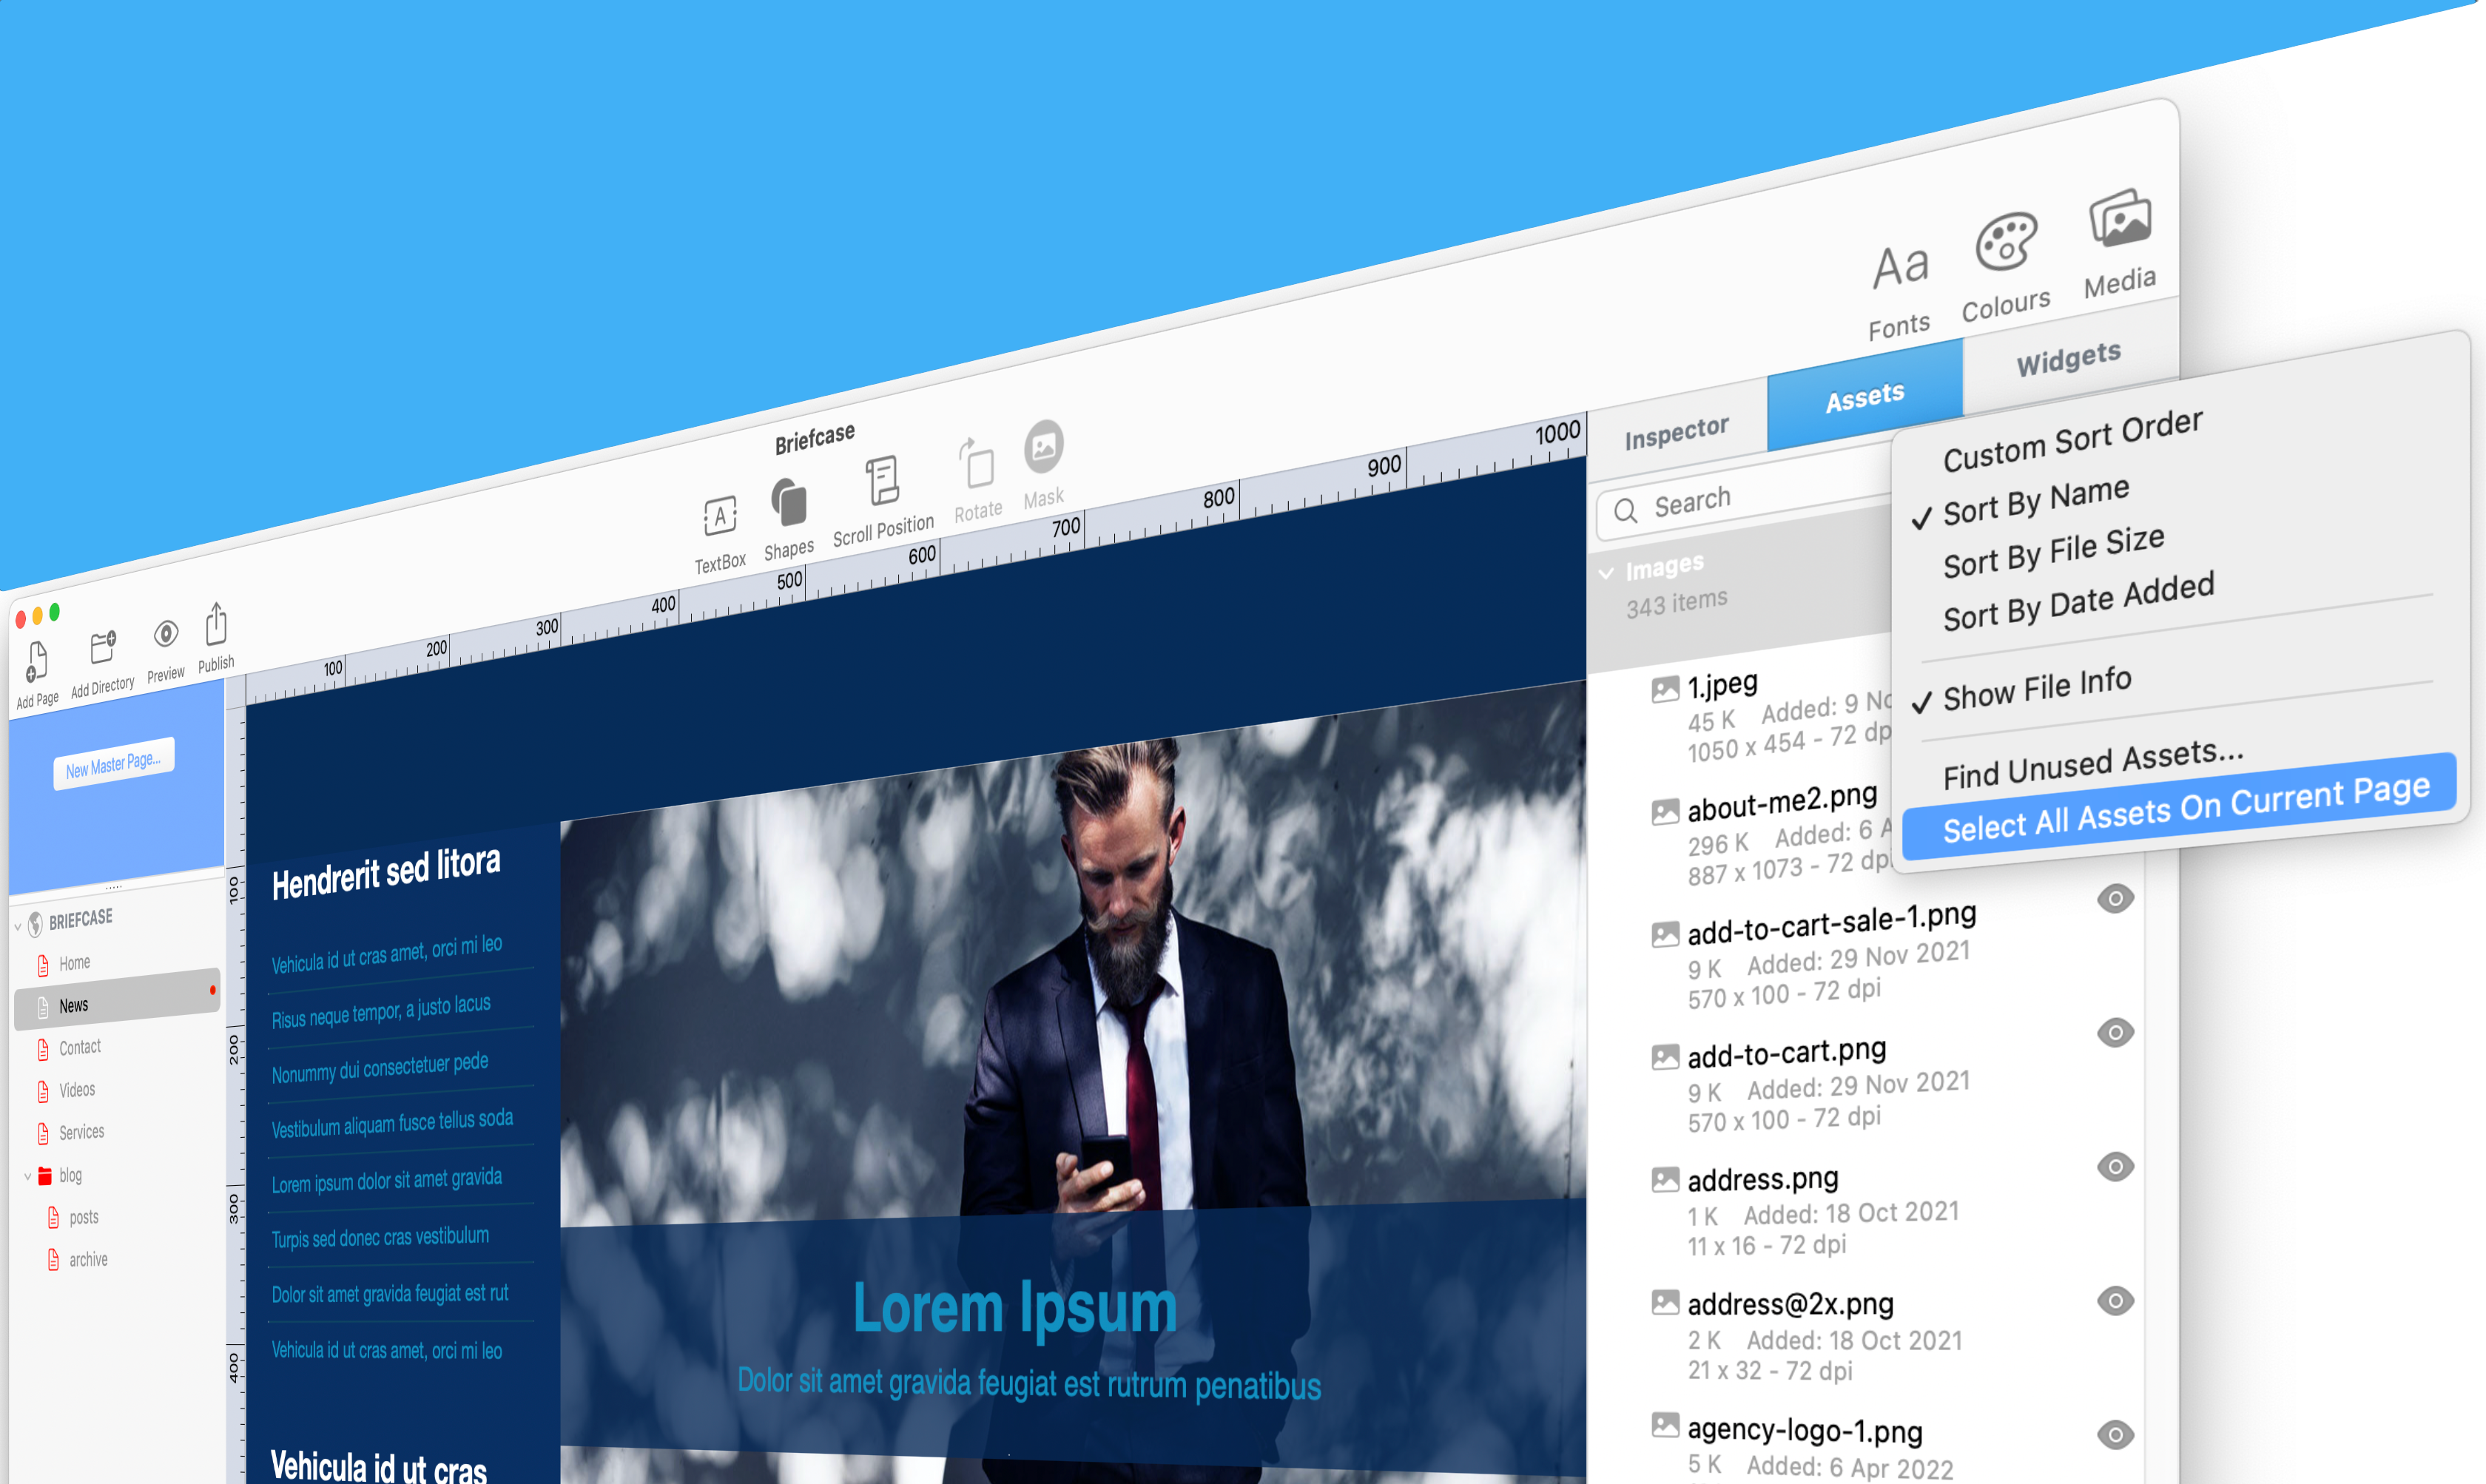
If you find organizing your website’s image assets in EverWeb’s Assets list to be a necessary, but tedious activity that takes a lot of time to do, EverWeb 3.8 has the perfect solution for you!
If you have a small website with just a few images in it, you probably will not need to organize your image assets in the Assets List at all. If, however, your website uses a lot of images, or has images added to it on a daily, or regular basis, then organizing these image assets can be important, but also something that you want done quickly and painlessly.
Organizing Your Images
The first thing about the image files the you use in your website is that it is always a good idea to name your images as something memorable before you import them in to EverWeb. Photo image files are typically a good example as cameras and mobile phones often label image files using a sequential letter/number sequence which means that it is going to be harder to identify the image without looking at it first. So, if you have one or more images you want on your website, label the file name with some form of relevant descriptive name.
The other good reason for naming your image files with a descriptive name is that it is good for your website’s Search Engine Optimization (SEO)! Choose a file name that describes as best as possible what the image itself is about. Again, this is something that is best done before you import your images in to the Assets List in EverWeb. If, however, you have already imported images that do not have SEO friendly file names, you can rename the files in question by double clicking on their file names in the Assets List and changing the name there. This is an adequate workaround but not as good as natively importing image files with good SEO names.
Asset List Folders
Since EverWeb 3.0 you have been able to organize your image assets in to folders and subfolders. There’s even a Search box so you can quickly locate image assets in the Assets Tab if you need to. Another quick method of finding an asset in the Assets List, if you already know the file name, is to use predictive search. Just click on the Assets tab then click on the first asset in the list and start typing the name of the asset you are looking for. EverWeb will use your keyboard input to locate the file quickly as you type.
In our latest version 3.8 release of EverWeb, you can now collect together all of the image assets of a specific page in to their own dedicated folder in the Assets List just with a couple of mouse clicks! It’s super easy to do and will help you get your Assets List organized in no time!
Creating a Folder for Image Assets on the Current Page
- Start by selecting the page you want to create an Assets List folder for.
- Click on the Assets Tab.
- Click on the Settings Cog/Button and choose the option ‘Select All Assets On Current Page’.
- You will notice that all of the image assets on the current page will be highlighted in the Assets List.
- Now click on the ‘+’ button to add a new Assets List folder.
- Name the folder as required e.g. the name of the current page.
- The selected assets will now be added in to your new folder.
- Repeat the above steps for other pages whose assets you want to group in the same manner.
The new Assets List feature is a simple, yet quick and effective way to keep your image assets manageable and organized in page related folders. Let us know in the Comments Section below if you this feature is useful and what other asset related features you would like to see in future versions of EverWeb!