
Contact Forms Enhanced Addon’s New Calendar and Select Time Form Controls
February 4th, 2021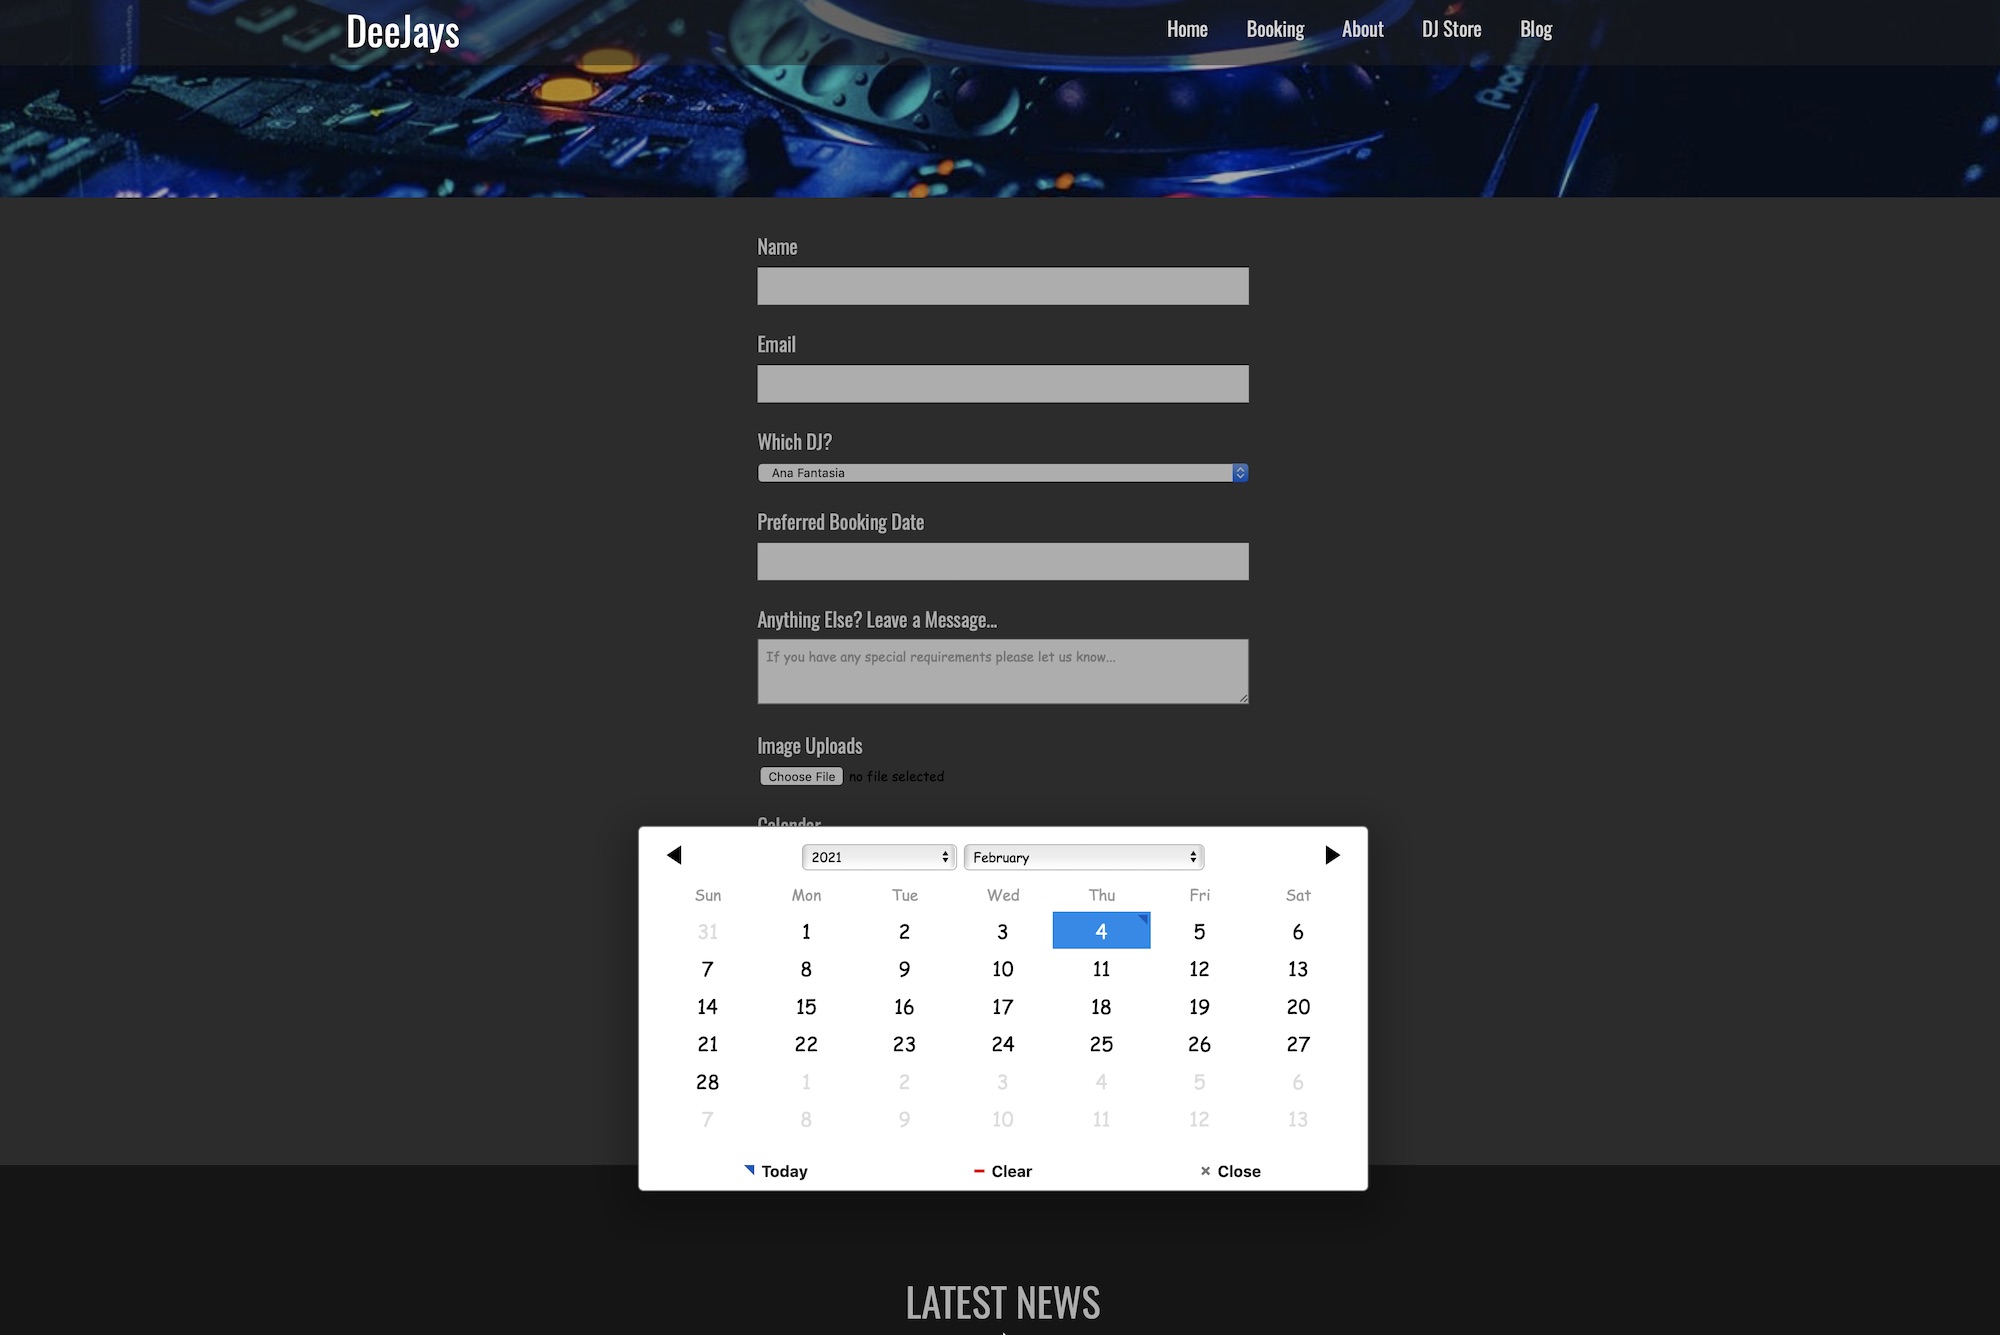
If you use EverWeb’s Contact Form Advanced widget with its companion Contact Forms Enhanced Addon, you now have two new form controls to take advantage of with the release of EverWeb 3.4.
The Calendar and Select Time form controls help make it easier for your visitors to select date and/or time options directly from the contact form. The new controls are highly visual and fully customizable making it less likely that those filling in your contact form will make a mistake when choosing date/time combinations.
Better Control of Your Diary
Setting up calendar and/or a time slot lists in your Contact Form gives you more control of your own diary. EverWeb’s customization options give you control over your availability as you can block out days of the week when you’re not available, e.g. Sundays, and you can set your own working day availability for appointments and bookings.
Your contact form can now more easily be used as the front end to backend booking and reservation systems.
Visual Appeal for Your Visitors
For your visitors, the new form controls are easy on the eye and easy to interact with. When selecting the date and time for bookings and appointments your visitors will have a better overview of your availability.
You can format both controls to have exactly the right date and time formatting that you want, no matter where in the world you are, as there are seven different date formats included and four different time formats to choose form.
The Contact Forms Enhanced Addon
As you may already know, the Contact Forms Enhanced Addon is a supplemental product for use with EverWeb’s Contact Form Advanced widget . The Contact Forms Enhanced Addon can be purchased just by clicking on the Contact Forms Enhanced Add-On dropdown box in the Contact Form Advanced widget. Choose ‘Add Contact Form Enhanced Features…’ from the dropdown menu You will then be guided through your purchase.
After completing your purchase, click again in the Contact Form Enhanced Add-on field. In the dropdown menu, your purchase will be shown as, for example, ‘Contact Forms Enhanced 1GB (12345)’. Click on your purchase so that you can use all of Contact Forms Enhanced features.
Setting Up Calendar and Select Time Form Controls
If you are familiar with the Contact Form Advanced widget’s Form Controls, adding the new ones in to your form is just the same. In the Form Control section of the Widget Settings, click on the Add button under the Form Controls list. After naming the new Control, click in the Control Type dropdown menu below the Add button. From the list choose either ‘Calendar’ or ‘Select Time’. The Option List below the Control Type field will display all of the customization options available to use.
Customizing the Calendar Control
There are seven different date display formats available for you to choose from. There is also the option that when the visitor submits their form to you, the date format in the submitted email can be different to the display format. For example, your market may be in the US but you are based in Europe. You may, therefore, want your visitors to see the date in MM/DD/YY format, but you prefer to receive their submitted form in DD/MM/YY format as it is more compatible with your European backend systems.
The display of the calendar in the form is also highly customizable. Start by choosing how many years you want the calendar to display. For example, if you set the number of ‘Years to Show’ to 5, when you click in the Year field in the form you will see the five year range, 2019 – 2023 with the current year, 2021, in the middle. If you use the back arrow key to scroll the calendar backwards you can access dates before 2019. For example, if you choose May 31, 2017 and click in the year dropdown box, you would see 2015 – 2019, i.e. 5 years with 2017 in the middle . The same concept would apply if you scrolled the calendar a year in the future.
The Calendar Control’s options allow you to set the start and end point of the calendar. For example, I may want to limit the calendar to the five year period used in the above scenario. In this case, I would set the ‘Earliest Date’ field value to be January 1, 2019 and the ‘Latest Date’ to be December 31, 2023.
As mentioned earlier the Calendar Control allows you to block out specific days of the week. This is useful if you e.g. never work on a Sunday, or you always use Wednesday’s for admin and never have appointments. To set the blocked out date, just check the box next to the days you want to exclude from the calendar. Blocked out days appear greyed out in the Calendar display.
Customizing the Select Time Control
Use the Select Time control to schedule appointments. You can specify how long each appointment slot lasts as well as how long the working day is.
Once you have selected ‘Select Time’ from the Control Type dropdown menu, you can use its options from the Options List. In the same manner as for the Calendar control, you can choose to have your Display Time and Submit Time options set differently to each other. For example, if your customers are in North America, you may set the Display Time as 2:30 p.m. style, but if your business is based in Europe, you may want the Submit Time option to be 14:30 i.e. using the 24 hour clock which is more commonly used in Europe. The same is true for the List View option which is used to show the list of available time slots when your visitor clicks on the Select Time option in the form.
You have four different time styles to choose from for these three options.
Use the Interval option interval to set how long each appointment slot will be. The default is set to 30 minutes. Enter the amount of minutes that you want for your appointments e.g. 60, 90, 120 and so one. The list will automatically calculate the times of the appointment slots for you.
Last but not least, set the length of your working day using the Start Time and End Time fields.
EverWeb’s new Control Types will help you easily create visitor friendly booking and appointment contact forms as well as enabling integration with back end systems.
EverWeb on Social Media
You can also find EverWeb on the following social media platforms: