EverWeb Blog Posts Explained
Friday, April 18th, 2025
In our last post we looked at the basics of blogging and how to get started with your own blog in EverWeb. In this post, we will be looking more in depth at how you blog, and how to make the most of EverWeb’s blogging feature so you get the best out of your blogging investment!
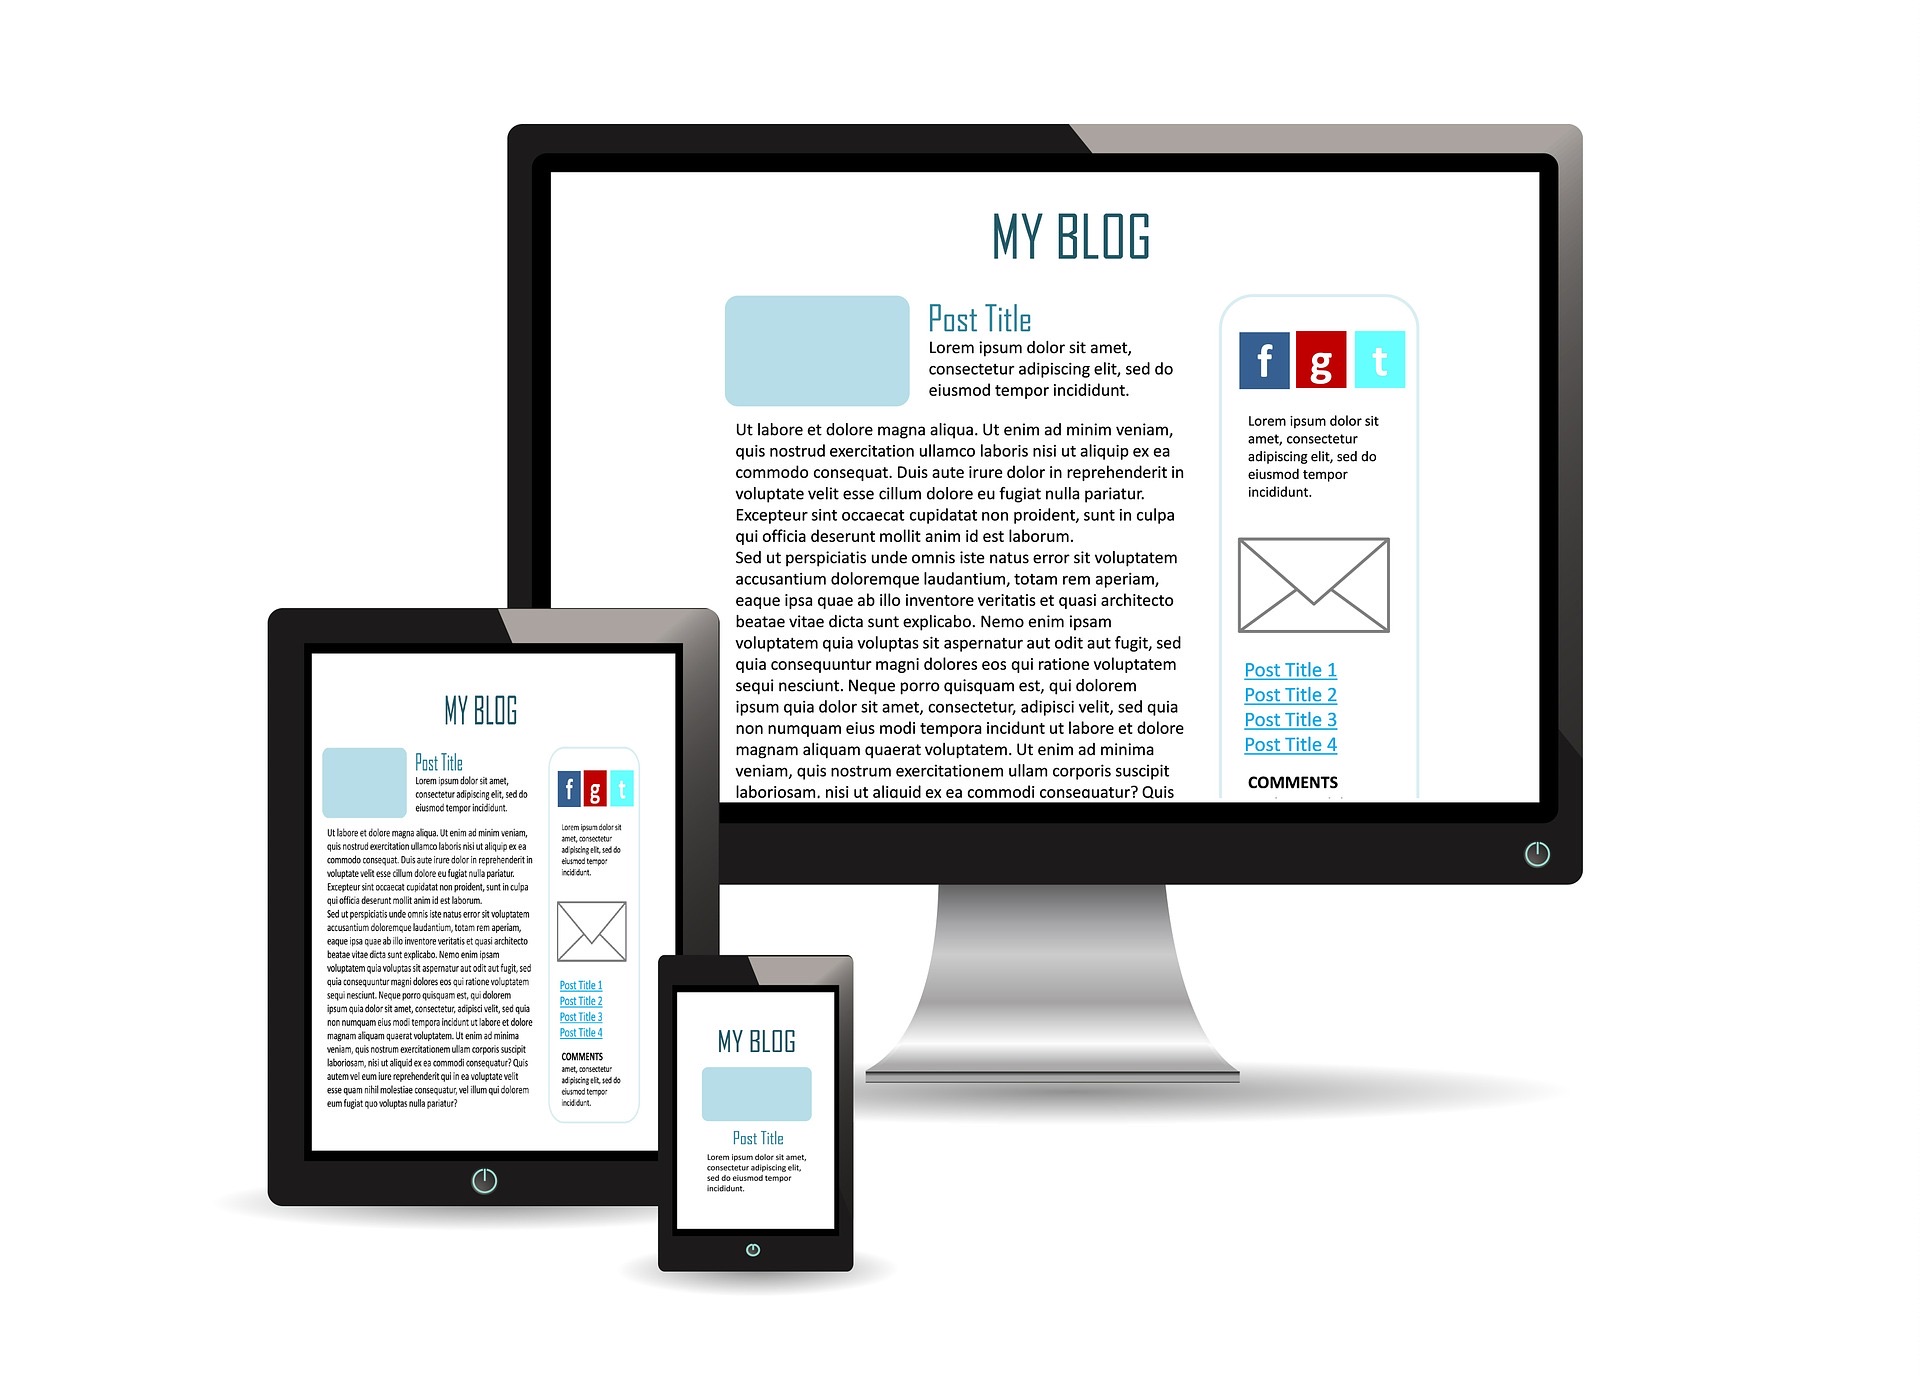
The Blog Posts Page
EverWeb’s Blog Post page is where you create and manage your blog posts. In this way, the ‘posts’ page is unique. It is comprised of four sections:
The Blog Post List
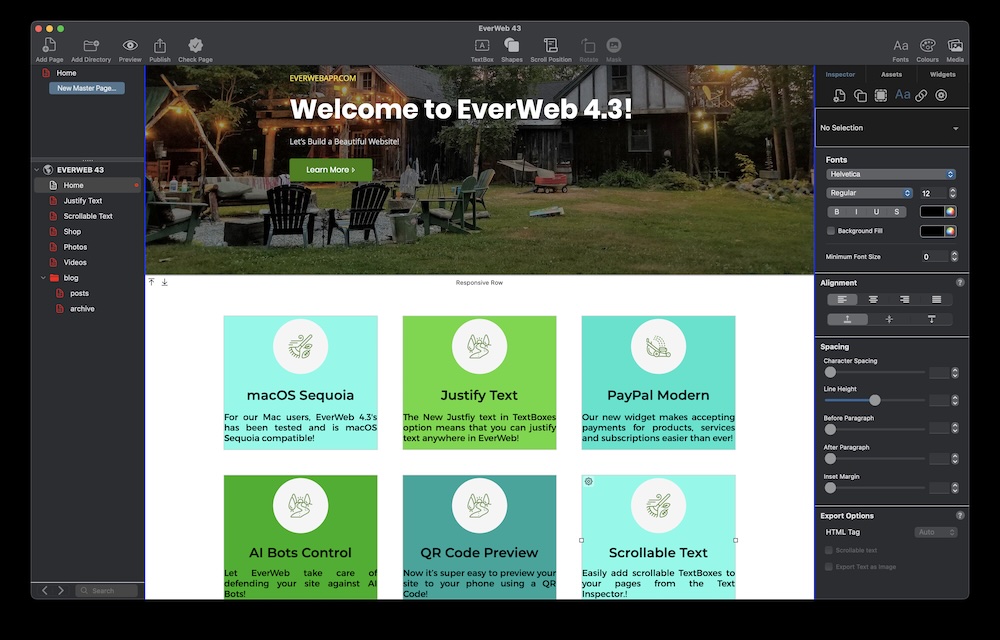
When you click on the ‘posts’ page, in the Web Page List, you will enter the heart of EverWeb’s blogging environment. In the top section of the posts page is the Blog Post List. Here is where you can see listed all of the blog posts that you have created. It is also where you can create a new post, delete posts, as well as add in SEO to your posts and import blog posts from iWeb and WordPress using the Settings Cog icon.
Once you have created a blog, you can also set the date and time that you want time stamped on the post, or set the publish date and time to the same as your website publishing date/time.. Simply click on the blog post’s date field to set this up. If you do not want the blog post to be published yet, e.g. if you are still working on your post, then you can click in the Draft checkbox. Notice also on the far left hand side you have red and green traffic lights that indicate whether the post has been updated since it was last published.
The Blog Post Editor Window
The heart of your blog post is your text and the Blog Post Editor Window is where you create your content. You can use the Blog Post Toolbar to style your post. If you are using EverWeb 4.0 or higher, you can even use Paragraph Styles in your post. You can also include images within your post by drag and dropping them in to the Blog Post Editor. When you do this, you will see an Image Toolbar that allows you to add ALT Text to the image and set its alignment as In-line or break text. The Blog Post Editor Window also lets you add in video and audio files using the Video icon in the Toolbar.
The Blog Post Preview Window
When you add your content in to the Blog Post Editor Window, you will notice that it is also displayed as a preview in the Blog Post Preview Window which sits directly below the Blog Post Editor Window. You can think of the Blog Posts Preview Window as a kind of Master Page in which your content sits. When you create your first post, you will notice that the Preview Window contains a Header, date at the top of the Preview page and the EverWeb logo at the bottom. All these features will appear on all of your blog posts. You can add, delete and rearrange objects in the Preview Window as desired. For example, if you add your company logo to the Preview Window, it will appear on all of your posts. If e.g. you remove the EverWeb logo from the Preview Window, it will not appear on any of your posts. Therefore, use the Preview Window to format and customize the look of your blog itself if you want to. Alternatively, you can still use a Master Page instead if you prefer.
Blog Post Settings
In the Blog Posts Preview Window section above, we mentioned styling and customizing it to get the look that you want for your blog. Many of the customization settings can be found in the Blog Post Settings column that runs down the right hand side of the posts page. Here you can customize the fonts used for the posts header and date fields.. Additionally you can also add an image to the post and define the colors that you want to use for any hyperlinks. You can also create Navigation Links within the blog post to make it easy to navigate to the next or previous post as well as to the blog’s Index page. The last part of the Blog Posts Settings section is for adding a Comments Engine, such as Disqus or FaceBook Comments, if you want to allow your visitors to add comments about what you have posted.
SEO and Blog Posts
The last important part of the blog posts page it to remember that you can add in SEO to your posts. The post’s header will be used, and you should add keywords in to the first paragraph of your post if it is suitable to do so. If it is not, please just create good content instead. Google will prefer that to you adding keywords just for the sake of SEO.
In addition, you can also add keywords and summaries to your blog posts. Select the blog post that you want to apply SEO to in the Blog Posts List. Next, click on the left hand bottom side of the Blog Posts List. Choose the Post Options… menu option. You will now see a dialog box where you can add in a short summary description of your post, as well as Keywords relevant to your post. Once you have added these in, click on OK to finish.
Adding posts to your blog is super easy and super flexible! In our next post we will be looking at the blog page and the archive page.